Using Virtual Machines Part 1
My friend Peter Davis recently asked if I could do a blog post how we use virtual machines (VMs) for LabVIEW development. Before I go into too much detail, I do want to say that I learned a lot of what I know about VMs from John Giannangeli of Bolder Software. He did a presentation, probably 2 years ago now, at ALARM. It is worth checking out.
This is the first part of a 2 article series. Here is a link to part 2. This first article is about why one should consider using virtual machines for LabVIEW Development. Part 2 will talk about the details about how we use VMs for development here at System Automation Solutions.
What are virtual machines?
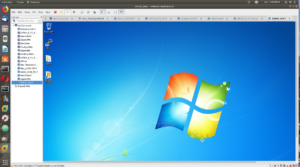
A virtual machine is basically an emulator. It is a computer program that emulates an entire pc. It allows you to run one PC inside another. You have your host system, which is the physical PC. You have a virtualization program running on that which does the emulation. The virtualization software gives the guest operating system the illusion that it is actually running on its own seperate PC. A common reason people do this is to run multiple Operating Systems on the same PC. For example Mac users quite often use this solution for running Windows, so they can access programs that aren’t available for Mac.
Why use virtual machines?
The first thing to understand is why anyone would bother using virtual machines in the first place? Creating and maintaining virtual machines takes some time and effort, so before making that investment it is worth understanding what you are trying to achieve. There are several reasons to use virtual machines for LabVIEW development.
1. Cutting the ties with Windows
Even though there are LabVIEW versions for Mac and Linux, unfortunately, most LabVIEW work is still done on Windows. Personally, I prefer Linux and when I go to NI Week and the CLA Summit, I see a lot of people with Macs. With a virtual machine, you can have a computer that normally runs OSX or Linux and just switch to Windows when you need to write some LabVIEW code. A virtual machine gives you the freedom to use any computer you want to write LabVIEW code, regardless of what operating system it runs.
2. Avoiding complications due to multiple LabVIEW versions
If you work on multiple projects, particularly if you support older legacy projects, you will likely have a need to work in multiple versions of LabVIEW. You probably started with one version of LabVIEW and simply installed that on your development machine and all was fine until you had a need for a second version. Your first inclination is probably to simply install the new version of LabVIEW right alongside the existing version. However, that is going to introduce some subtle problems.
When you install a program such as Microsoft Word, if there is an existing version it is removed and replaced with the new version. From that point on any document you open is opened with the new version. With LabVIEW, things are a little different. NI doesn’t want to force you to upgrade legacy code, so the new version is installed alongside the existing version. The way in which Windows determines which version to use will cause problems when double clicking on LabVIEW file (vi, ctl, lvlib, lvproj, etc) in the Windows File Explorer.
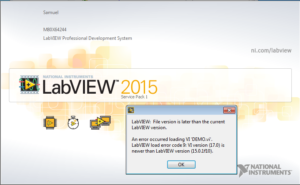
What you probably want when you double-click on a vi is to open it with the last version it was saved in. However, Windows simply opens it in the last version of LabVIEW that was used on that computer. If that LabVIEW version is older than the file, then it can’t be opened and you get an error message. This is annoying but benign.
The real problems occur when the LabVIEW version is newer and LabVIEW tries to be nice and automatically updates your code to the newer version. However, it doesn’t give you any indication that it has done so. If you aren’t paying attention (all the new editors look very similar) and edit your code and save it, now you have unwittingly updated your code to a new LabVIEW version. Going back is not always easy. If you are using source code control you could roll it back, but you would lose your changes. You could also save for previous, but that is tedious. It’s better to avoid this situation.
If this is the only issue you are having, you may not need virtual machines. There are some simpler solutions out there. One of those is AVM.
3. Managing Driver Versions, Conflicts, and Traceability
Driver Versions are the main reasons that we at SAS use virtual machines for LabVIEW development. Every project we work on has different driver requirements. Installing and uninstalling drivers when you switch from one project to another is a pain and error prone.
Often drivers are incompatible between projects. Sometimes it is really subtle. For example project A and B may use different versions of a particular 3rd party driver. Both projects may compile and build with either version (ie. the APIs are compatible), yet when you deploy it the hardware may complain or not work without the correct version.
Also if you work in a regulated industry, traceability (keeping track of driver versions) is really important. The easiest way to do that is to have a virtual machine for each project configured with the correct drivers.
4. Matching System Specifications
Chances are that you do your development on a different machine than you deploy to. I do most of my development on a workstation with a quad-core Xeon processor and 64GB of RAM. It’s superfast. Anything I write on it is highly performant. Most of our deployed systems don’t have anywhere near as much processing power or RAM. How do I know my code will work on a PXI chassis with a dual-core core Celeron and 2 GBs of RAM? With a VM, I can specify the number of cores and the RAM to make my development environment more closely resemble the deployment environment. It’s not perfect, but it gives me a good indication of if I’m going to run into problems.
Conclusion
As you can see, if you work on multiple projects, VMs can be a useful way to manage the differences in LabVIEW versions, drivers, and hardware between projects. Part 2 of this article will describe the tools and processes that we use to create and manage virtual machines.
This is the first part of a 2 article series. Continue to part 2.

