Git Tips For Beginners

Git is a great source code control tool, but it is not known for being user friendly. It’s actually a shame. The way in which git stores and references content is incredibly elegant, but it’s UI seems more of an afterthought. The command structure is not at all consistent and some commands do vastly different things depending on what parameters are passed to them (and there are a lot of parameters). It can be overwhelming and frustrating to learn and master. I’ve watched a lot of people struggle over the years so here are some tips and tricks to make it easier. If you are completely new to git, read this article first.
I am going to use the CLI for these tips. I know many of you are LabVIEW programmers and allergic to the Command-Line, but I urge you to give it a try. I don’t think anyone has died from using it yet. If you use some of my suggestions here it will make a lot easier to use git and to understand what is going on. Also on the plus side, the CLI is much faster than any of the GUIs. In addition, if you get stuck and have to ask questions on Stack Overflow you are most certainly going to get back a bunch of Command-Line gibberish. While I don’t recommend doing this without understanding the ramifications, you can simply copy-paste these answers directly into GitBash. Good luck figuring out how to do that in the GUI of your choice. The commands can probably be replicated but it will take some deciphering. In some cases, it can’t be done at all in a particular GUI because not all commands or options are exposed in the GUI, which forces you to use the CLI anyway.
Git help
Git help is not always the most useful, but can often help point you in the right direction. Understanding the basics will help decipher much of the help. Simply typing git with no parameters into the command line will give you a list of common commands. If you then type git help command, you can view help for that specific command. Depending on your setup that may open a man-page or a webpage. This can be useful because commands in git tend to use a lot of parameters and sometimes it is hard to remember them all. It is also useful when you go ask a question on Stack Overflow and get a bunch of cryptic commands as a response. The help can help you to understand exactly what those commands do before you run them. I recommend this. It is hard to lose data in git, but it is possible and some commands should be used with an abundance of caution, particularly reset --hard, rebase, and anything with the --force option.
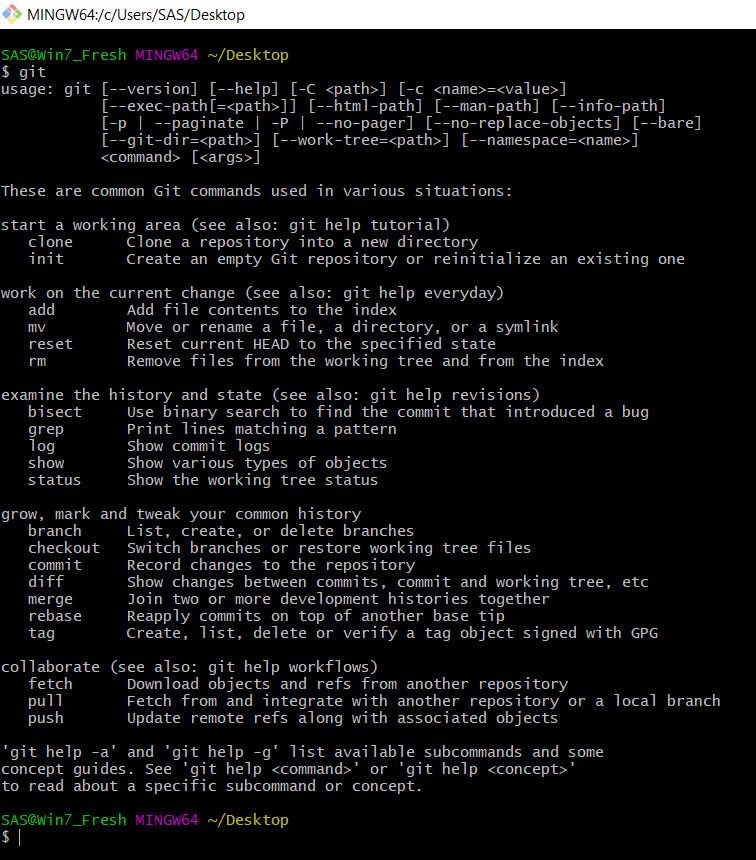
git into the command line with no parameters returns the following.
git help commit into the command line opens this .html file.Git aliases
Aliases are one of the pro’s best-kept secrets. Every time somebody tells me they are having trouble with git and I ask about aliases, they almost invariably don’t even know what they are. Because so many commands have lots of options, you might find that you use a certain set of options all the time. Aliases make this so much easier. For example, you might find yourself typing a command such as:
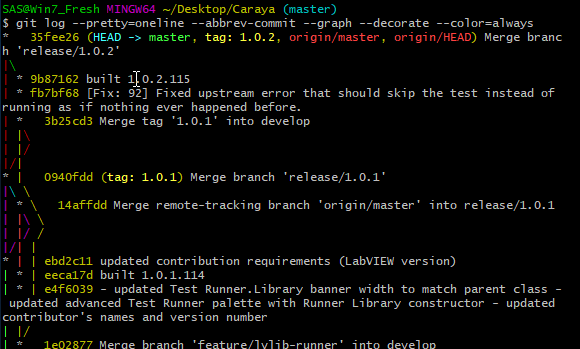
git log --pretty=oneline --abbrev-commit --graph --decorate --color=alwaysYou can use the help as outlined above to see what option does and what other options are available. This set of options produces a nice commit graph like the one below.

However, that is a lot to type. Also, if you are like me and can never remember all the options, going to help every time you want to see a commit graph is tedious. We can solve this by setting an alias within git.
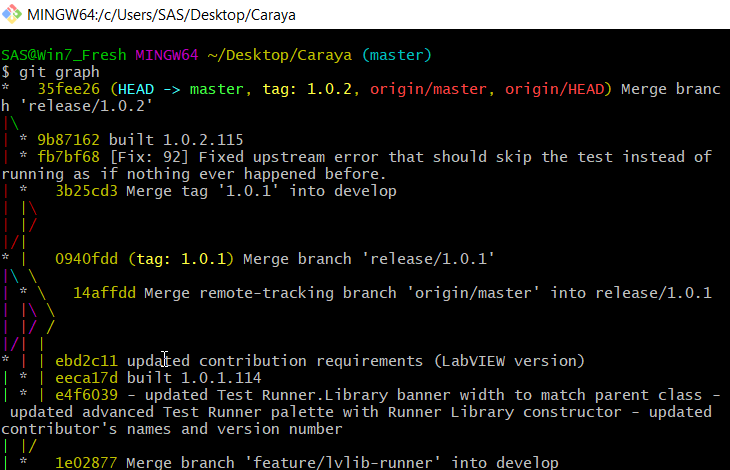
git config --global alias.graph 'log --graph --abbrev-commit --pretty=oneline --decorate --color=always'For more help on aliasing type git help config and search for alias. Now when we type in git graph we will get the same nice pretty graph with a lot less effort.
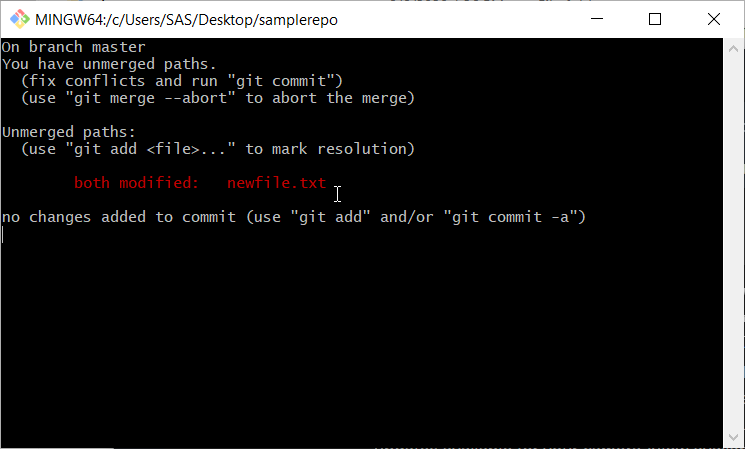
Git Status
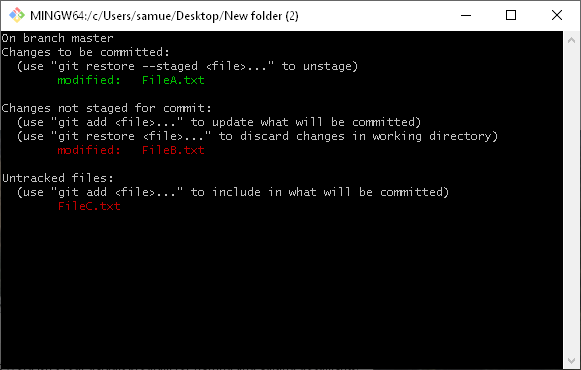
Git status is like your trusty git assistant. I wrote a little about it and how it relates to the index and working copy here. Now I would like to talk about the hints that it offers. At any point in time, it gives you useful information on what is going on in the system and what commands might be helpful. It prevents you from having to memorize tons of commands. It gives you a suggestion and if you don’t remember exactly what that command does you can go look it up in the help. Here are some examples of some hints you might get:
Because it is so useful it would be a good idea to have it viewable all the time. In linux there is a command, watch, that simply repeats a command every couple seconds and displays the output. Git Bash doesn’t have that built-in, but you can easily add your own. Take the code below and paste it into a file called watch (no extension) in the “C:\Program Files\Git\usr\bin” directory. Then you can watch any command you want by typing watch command.
#!/bin/bash
ARGS="${@}"
clear;
while(true); do
  OUTPUT=`$ARGS`
  clear
  echo -e "${OUTPUT[@]}"
  sleep 2
done
Now, if you try typing watch git status your shell window will constantly update with the latest git status. You can just leave that window open and then start another git bash shell to start issuing commands and watch the status update.
There is one problem with this as-is: For some reason, you lose the nice colors. If you dig into the help for git status you’ll find out that you can get them back by typing watch git -c color.status=always status. That is way too much to remember, so I made an alias.
git config --global alias.watch-status '! watch git -c color.status=always status'
Now the command git watch-status brings up a status window with all the colors.
Enabling frequent small commits
There are times when you want to commit very frequently. An example might be TDD where you quickly add a failing test and then you want to commit the test immediately so that if whatever you try doesn’t work you can quickly roll back your working copy changes and try again. Or you might be working with some legacy code that doesn’t have tests. In that case, you want to commit after every change so you have a very granular commit log so that you can easily rollback individual changes.
The key to committing often is to make it quick and easy. You need to limit the number of changed files to just the ones that you want. That requires a good git .ignore. For LabVIEW this includes .aliases and lvlps. It should include other things such as build folders. The other key component is to separate compiled code. Doing these 2 things stops you from having to go through the list of changed files and add each file individually. It lets you do the following:
git add .
git commit -m"all my changes including new files"
# If you know you haven't added any new untracked files
# you can simplify to a single line
git commit -am"all my changes to already tracked files"
If you are seriously into speed you might look up lazygit. It is like VIM for git. Like VIM it has a steep learning curve, but once you figure it out, it is blazingly fast.
A few more random tips
- Tab Completion – Tab completion is really helpful for adding files with long paths. It can also sometimes be useful for remembering git commands and options, (if you can remember what it starts with). It works well with paths with spaces as well since it automatically escapes them.
- Interactive add and commit – Most people don’t know about interactive add and commit so try
add --interactiveorcommit --interactiveThey are worth checking out. You might find them useful, particularly if you have edited a bunch of files but just want to select a few to add or commit.
.
