Checking for New GitLab Releases


In my previous posts, I talked about automatic versioning and automatically creating releases. The next step is to create auto-updating code. By auto-updating I don’t mean code that automatically updates behind your user’s back ala Windows 10. You can do that if you want, but I believe the user should have the option. By auto-updating I mean that your code can detect that there is a newer version, let the user know what features were added and which bugs were fixed and give the user the option of installing it.
First things first
Before embarking on this journey, I highly recommend you setup autoversioning and autoreleases. This is the last step in a pipeline. If you are going to automate this step, it makes sense to automate the other ones first.
We are going to use the GitLab Web API for this. It will help if you have a basic familiarity with web requests and parsing json. For web requests, I recommend the JKI HTTP REST client library and for JSON I recommend Dr Powell’s JSON library. You can find both on VIPM. If you are not terribly familiar with these, don’t worry. There is some example code at the end that should be enough to get you started.
API Keys
The first thing we need to do to set this up is to get an API key. A GitLab API key allows any program with access to the key to interact with GitLab as a user would. Be careful with this! There is a permission system for the actions that a key can perform, but there is no way to restrict an API key to a specific project. It is assigned to a specific user and the API key has access to every project the user does. In the paid version there is a way to generate a project specific token. The workaround for the free version is to create a dummy user that only has access to a specific project and use that user to create the API key. That way if it falls into the wrong hands they only have access to that one project. I highly recommend you do this for each project. I also recommend you give the user only reporter access to the project. That’s all they’ll need.
To create an API key, login as the user you want to own the key and go to User Settings -> Access Tokens. Enter a name and an expiration date if you wish. For this type of application, I typically don’t enter a date. For this purpose you can also select the read API option scope – that is all you need and it will limit the damage anyone can do if they get a hold of your key. Then just click on generate personal access token. You’ll see the token displayed. Save that value! It will disappear and we’ll need it later.

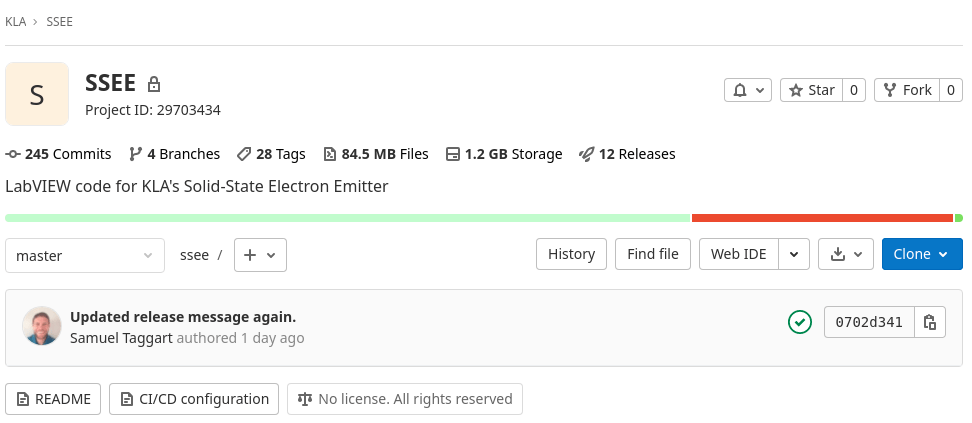
Project ID
You’ll also need the projectID. The projectID is specific to the loggedin user, so make sure you are logged in as the user who owns the key. You can find the ID on the main page for the project just under the title.
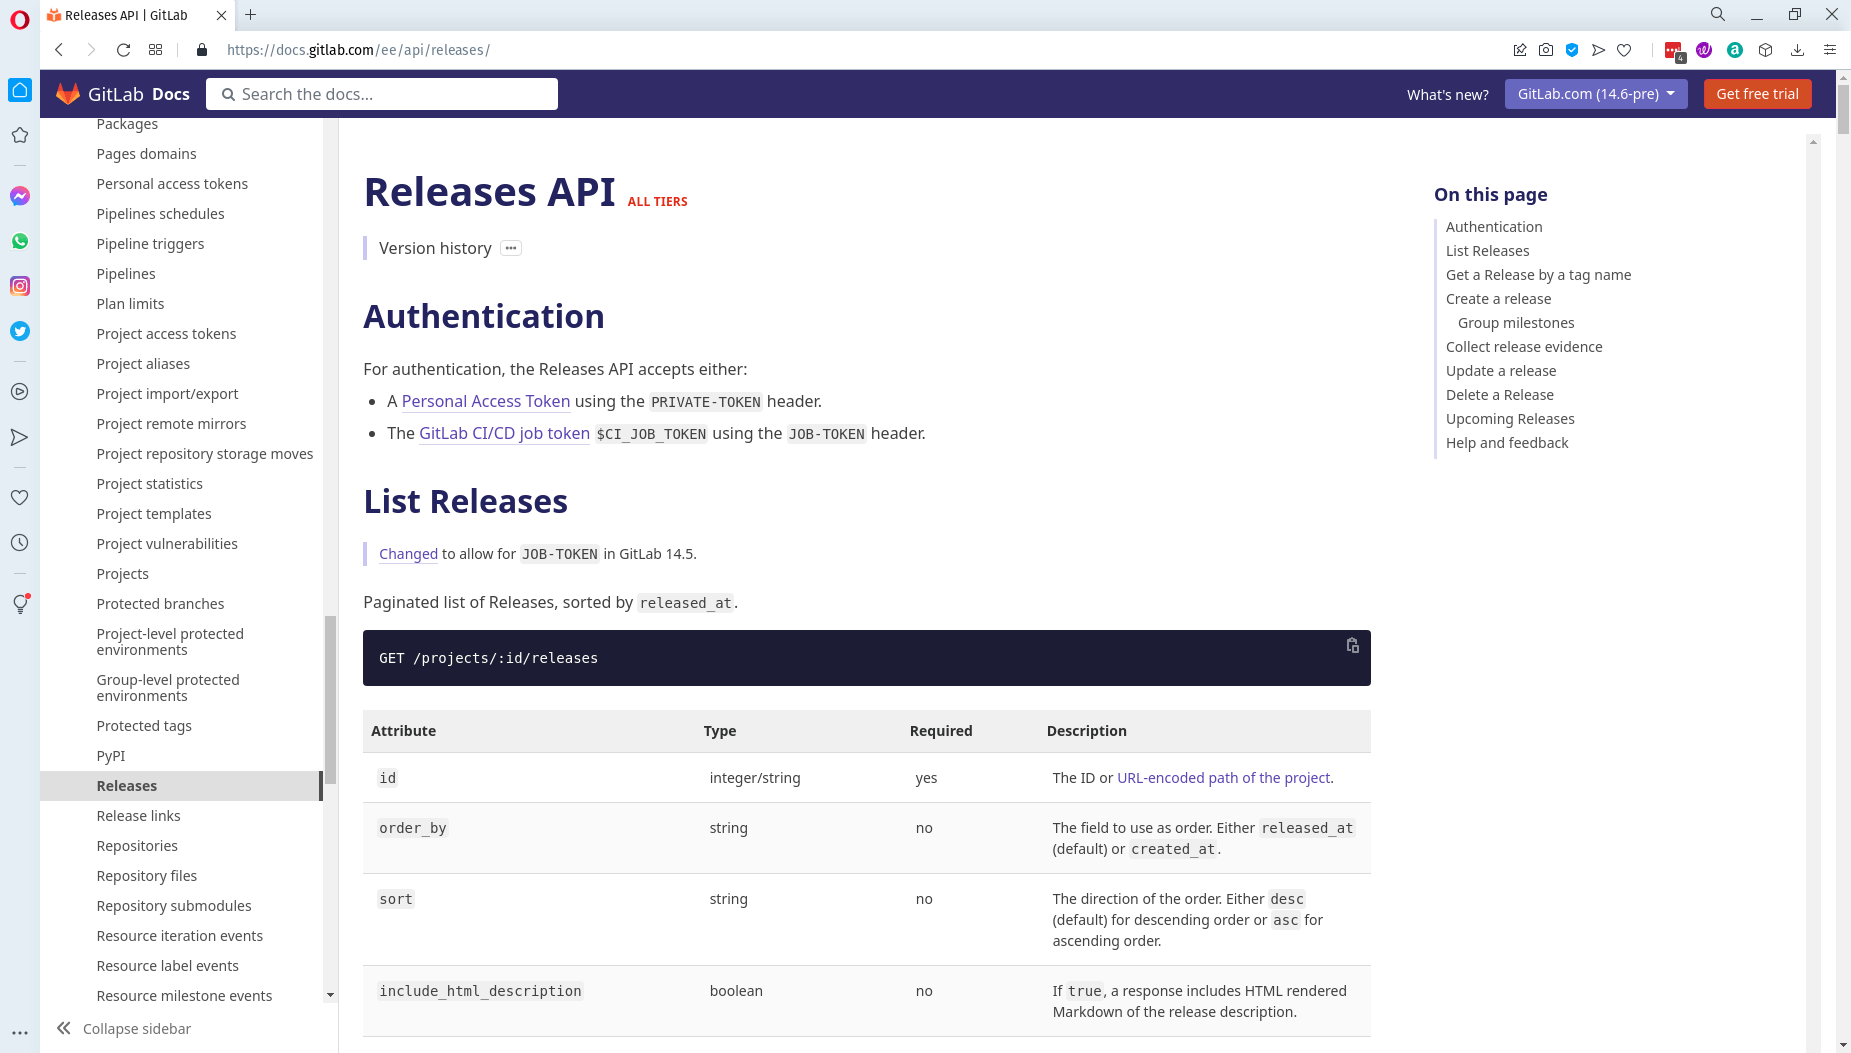
Releases Endpoint
The GitLab API endpoint we are going to use is the Releases Endpoint. It’s at /projects/projectID/releases, so you’ll need your projectID for the URL. And to authenticate we’ll use the API Token we created. We’ll pass that as a PRIVATE-TOKEN header. This will return a bunch of json that is an array of all the releases. If you go to the GitLab Help page for the Release API and scroll, you’ll see an example of what it returns, which will help with the parsing. You get an array of releases. For my purposes, I only care about the most recent one.
Retrieving the version
One way to retrieve the version is to just pull it from the tag associated with the release. That certainly works. I use 3 number tags, x.x.x for official releases. However, all my NIPM and VIPM packages had 4 number versions. I wanted a way to grab all 4 numbers, so instead I parse the json to get the filename of the package and then use a Regex to get the full 4 part version number. You can certainly do either depending on your needs.
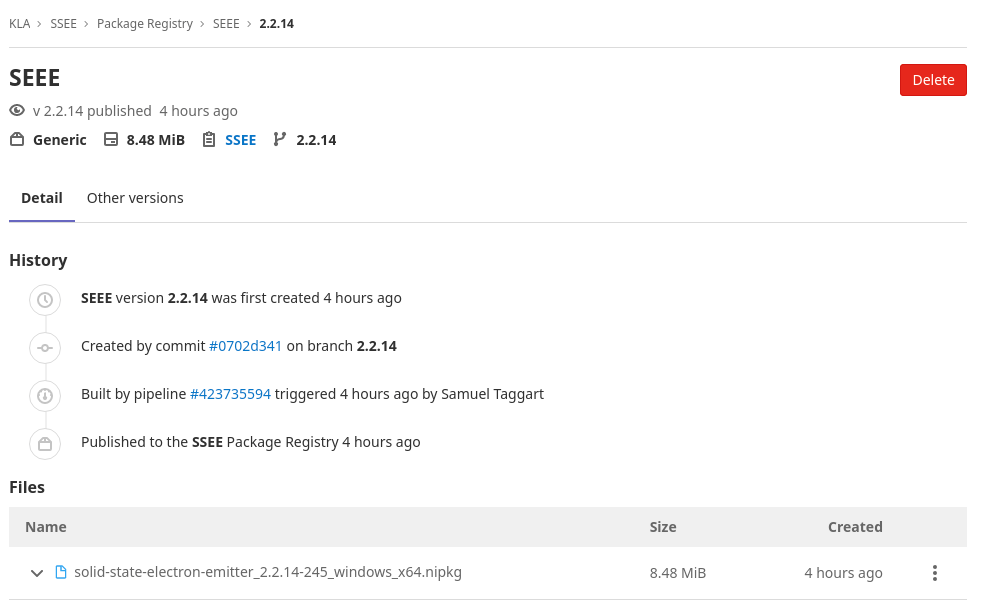
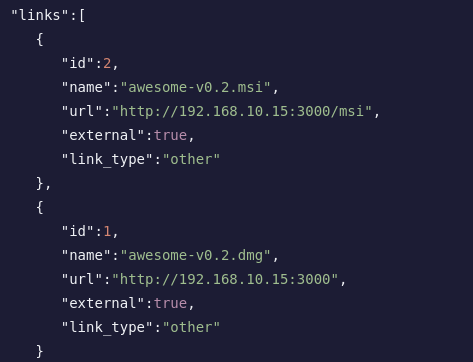
Getting a link to the package
Both the filename and the url for the package are in the links section of the json you get back from the releases API.
Release Notes
The way I handle release notes is that when I create the release, I put them in the release description. I can easily then just parse that from the json that I get back from the Releases API.
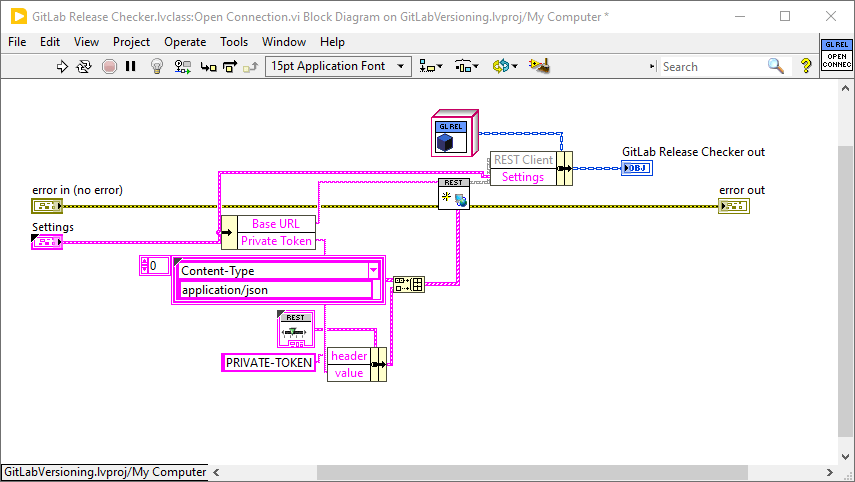
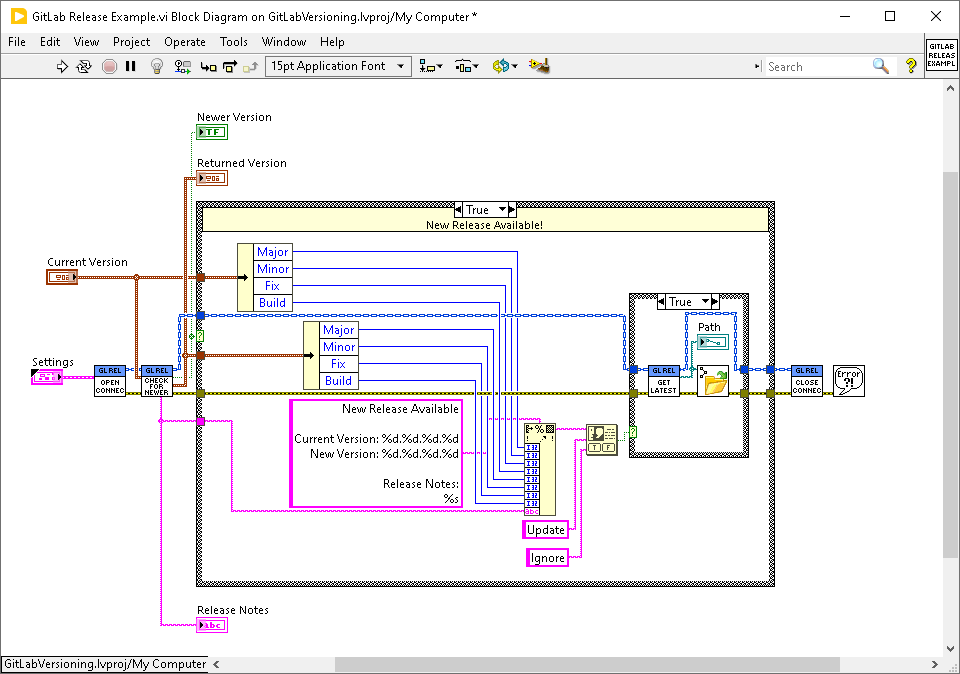
Example Code
All of this code is available on GitLab. If you go to the release page, you’ll find a VIPM package there that will install everything. It includes an example, shown below. This example is designed to be run at the start of your program. You pass in the API key and Project ID in the Settings Cluster and the current version number. If no new version is found, then the code just exits. If a new version is found, a popup is thrown listing the new version and the releases notes and asking if they would like to download it.
Gitlab API for LabVIEW
Joerg pointed out that he has an open-source LabVIEW wrapper for the GitLab API. I remember seeing that and thinking about using it, but for whatever reason I chose to write my own. I don’t remember exactly why. You should probably check it out.
https://www.vipm.io/package/hse_lib_gitlab_api/
Finding a System that works for you
What I’ve just shown you is how I do auto-updating apps. There are certainly other methods. I’m not claiming it is the best way, just what works for me. I am also always experimenting and finding new and better ways of doing things. If you have suggestions on how to improve it, please let me know.
If you have followed the past 3 posts you’ll have a simple system for taking code that is ready to be released and getting it into the hands of your customers. All you have to do is make a commit, tag and push. All your customers have to do is start your program up and if there is a newer version available, it will notify them, tell them what changed and give them the option to upgrade with the click of a button. It doesn’t get more convenient than that.
This makes it very easy to do agile development because it makes it very simple to get working code into your customer’s hands quickly.
If simplifying your release process like that sounds like a breath of fresh air, let’s talk. There are a lot of little gotchas that can trip you up. We’ve already worked a lot of them out so we can help you get up and running quickly. Use the button below to schedule a call.
