Using JKI VI Tester

If you have been following my posts, you will know that I am a big fan of JKI VITester. It is my goto Unit Tester. Why? Mostly because it is an implementation of xUnitStyle testing, which means that I can easily use all of the great patterns outlined in xUnit Test Patterns and all of the other literature on xUnit Testing. To be fair many of these techniques are not specific to xUnit Testing, However it’s nice to be able to just follow the examples easily. VI Tester also provides all the hooks I need to do Continuous Integration. It allows me programmatically run individual test methods, test cases or test suites so I can only run the tests I need.
Getting JKI VI Tester
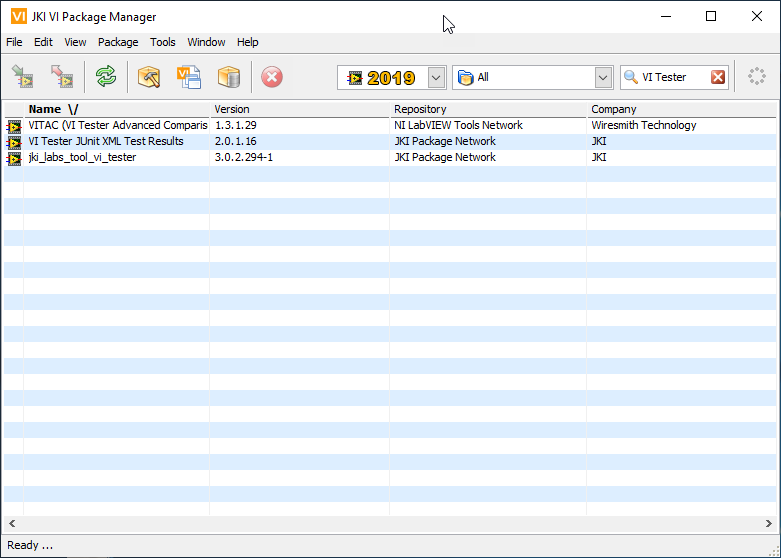
The easiest way to install JKI ViTester is via VI Package Manager. NOTE: You need to run VIPM as administrator in order to install it. If you search for VI Tester. There are 2 additional packages that show up that are worth installing. VITAC adds some advanced comparison features and JUnit XML Test results is useful if you do Continuous Integration.

Creating a New Test Case
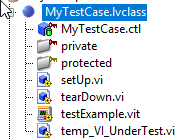
XUnit testing is built around the idea of Test Cases. Adding a new Test Case is really easy using the Tools menu. It will add a new Test Case Class to your project.


Creating a New Test Method

A test method is simply any VI in a test class whose name starts with test. If there is a place in which Vi Tester could be improved it is in creating new test methods. I will explain my process for creating my first initial test method. After that I delete the TestExample.vit and the temp_VI_underTest.vi and simply copy an existing test every time I need a new one.
- Right Click on testExample.vit and click “New From Template”.
- Goto to VI properties and make sure to check “Separate Source Code”. You can probably also make it non-reentrant since you are probably only calling it from one location at a time.
- Cleanup the BD and add your sequence structure.
- Save the VI. Make sure the name of the VI starts with test.
Once you have done all the above, you are ready. Write your first test, being careful not to fork the Test Case class wire. Then for each subsequent test, just save a copy of an existing test and modify as needed. Make your assertions as shown in the example VIT.
Setup and Teardown
You’ll notice the Test Class also has a setup and teardown VIs. Any code you put in these will execute before and after each test method respectively. If you need to pass any data you can add it to the class data.
You can also do new>VI for override and create a globalSetup and a globalTeardown VI. GlobalSetup executes once before any test method runs and globalTearDown runs once at the end. Because of the way VI Tester works if you need to pass data into or out of these methods, the class data will not work. You’ll have to use global variables or an FGV.
GUI
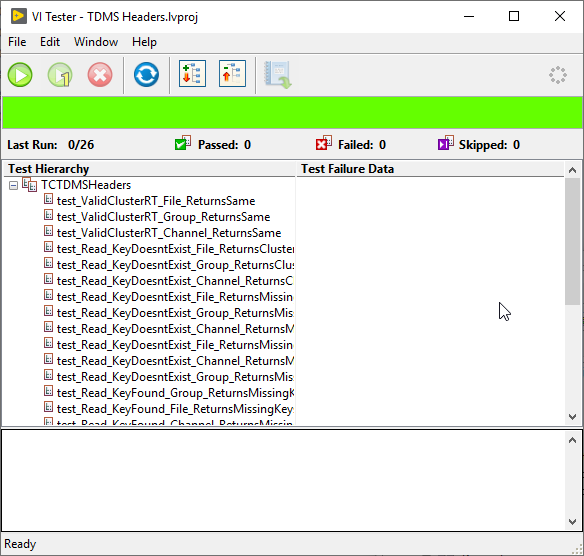
You invoke the VI Tester GUI from the Tools menu. The GUI will automatically load all the tests it finds in your project. It will allow you to run all of the tests, or any individual test method, test case, or test suite.


Creating Suites
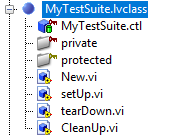
A test suite is just a grouping of Test Cases and possibly other Test Suites. You can create a Test Suite from the Tools menu. It will add a new class to your project. The method you need to worry about is New. Just follow the comments there to add Test Cases and/or other Test Suites.


Using the CLI
VI Tester comes with one API VI that accepts a path to a Test Case or Test Suite or an individual Test Case or Test Suite or an array of either. Running tests form the commandline is as simple as wrapping this vi with something that parses the CLI arguments.


