LazyGit


In a previous post, I mentioned lazygit in passing. It’s a nice CLI replacement for some of the Git GUI tools like SourceTree. It’s not too well known so I decided to do a little write-up on it.
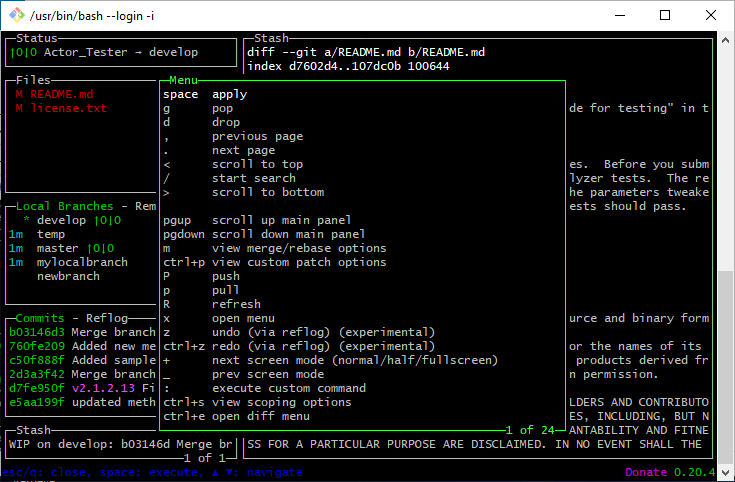
What LazyGit has over something like SourceTree is that is superlight weight and fast. It is quick and easy to launch from Git Bash and comes up almost instantly. A few keystrokes and you can do anything you want. I’ve heard LazyGit compared to Vim, so if you know what Vim is and like that experience, then you’ll probably like using LazyGit. If you’ve never used Vim or find it too complicated, don’t worry. I find LazyGit much easier to learn than Vim, mostly because you can hit x at any time to see the list of relevant commands and scroll through and execute them. They all have shortcuts, but you don’t have to memorize them if you don’t want.
Installing LazyGit
Installing LazyGit is easy. Go to the GitHub repo release page and get the latest Windows exe. Drop that into C:\Program Files\Git\usr\bin This will require administrator permissions. If you don’t have admin permissions, you can try from inside git bash, copying it to ~/bin and adding that folder to your path using PATH=$PATH:~/bin That shouldn’t require admin privileges.
Launching LazyGit
To start LazyGit just type lazygit at the Git Bash Prompt. In keeping with the theme of the program, I created an alias by adding lg=lazygit to my ~/.bashrc file. Then I can just type in lg.
Navigating
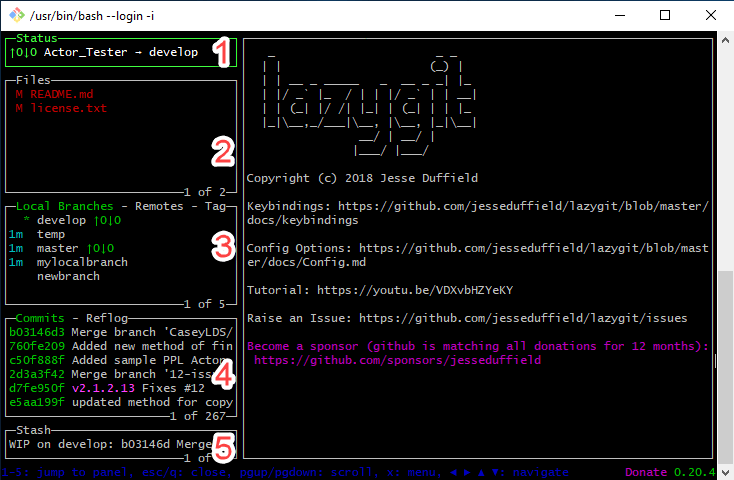
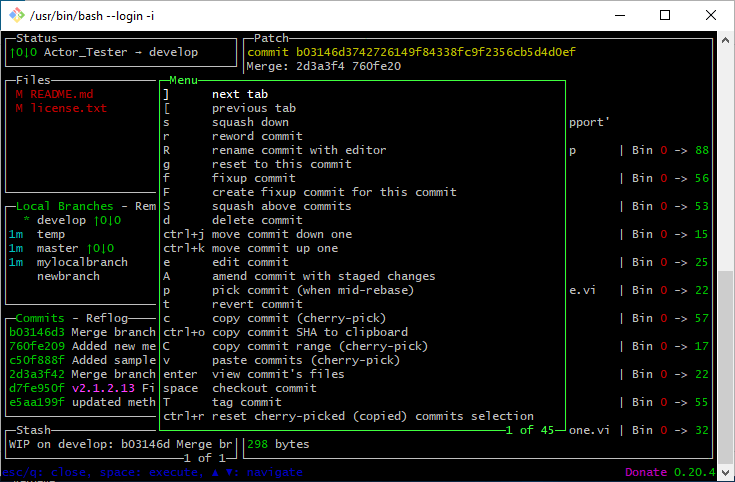
LazyGit has 5 screens. There is a menu of sorts on the left-hand side. The box highlighted in green is the current screen. You can switch between them using the number keys to select one directly or the left/right arrow keys to cycle through them. For the main pane on the right, you can use page up and page down to scroll that. When you start out, you will be on screen 2, the Files Screen. For this post, we’ll tackle the screens in order.
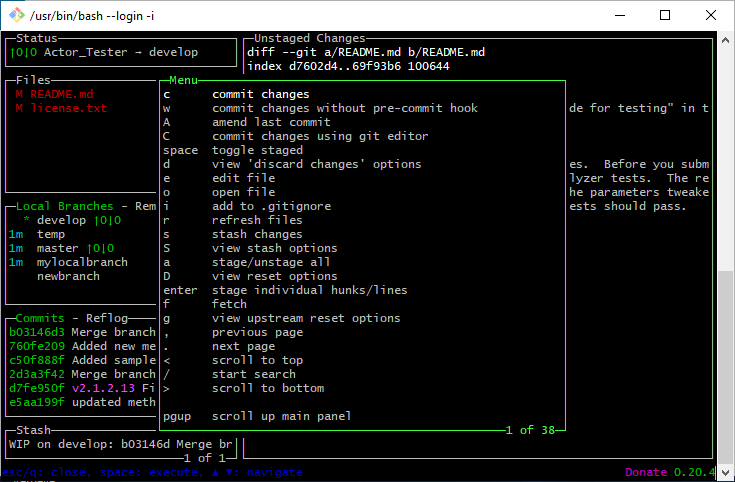
Status View
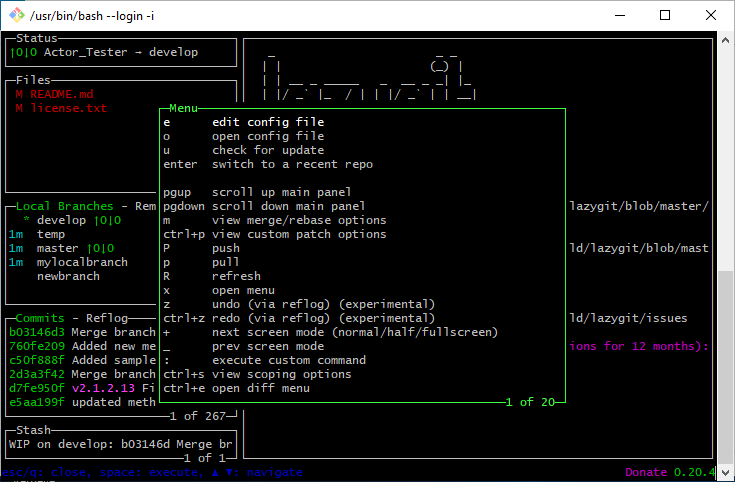
The Status View just shows a splash screen on the right. On the left, it shows the repository name, current branch, and whether you are ahead or behind. No matter what view you are on, you can always press x to see the list of commands for that particular view. You can scroll throw them with the arrow keys and hit enter to execute the selected command. Note on the left it shows the shortcut for each command. You can just use that from the main view to execute that command. For example to push you could start LazyGit, then type ‘1’ to select the status view, and then ‘P’ to push.
Files View
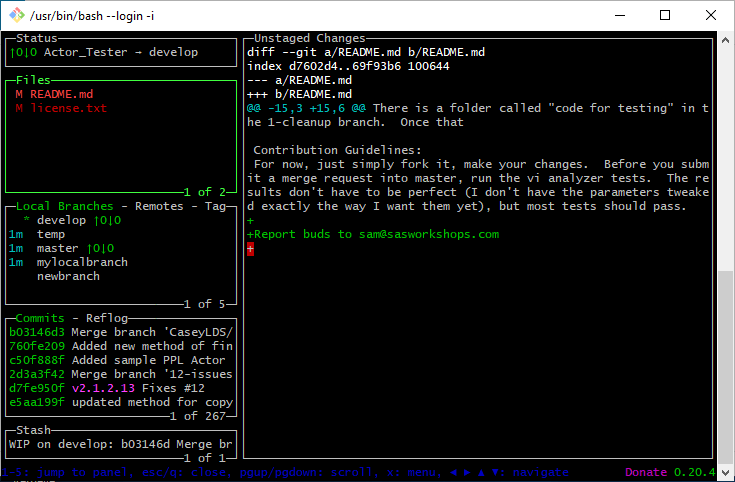
The second screen is the Files View. On the left it shows a list of modified or added files. In the pane on the right it shows the diff of the file you have selected. You can use the arrow keys to select among the modified files.
Some useful commands in the Files View are:
- ‘a’ stages or unstages all files
- space toggles whether the selected file is staged
- ‘d’ to discard changes.
- ‘c’ to commit
- ‘A’ to amend
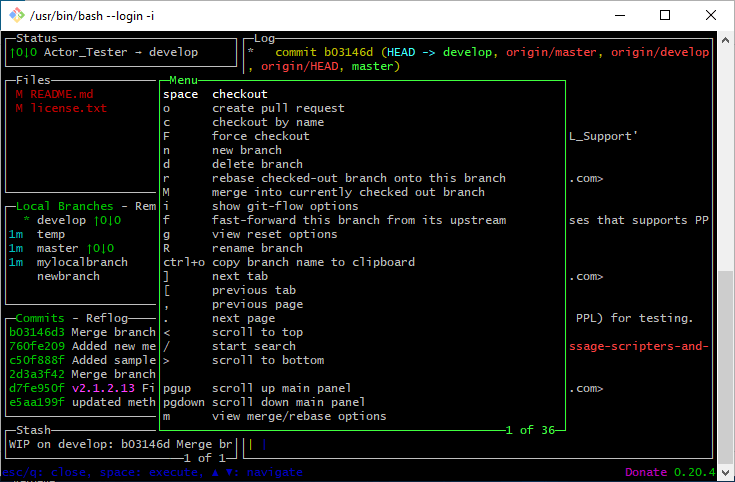
Branch View
The branches view lists the various branches. The left side lists the branches and whether each is ahead or behind and how old the last commit is. The pane on the right shows the log output for the selected branch.
Some useful commands in the Branches View are:
- space to switch to the selected branch
- ‘r’ to rebase current branch onto the selected branch
- ‘M’ to merge selected branch into the current branch
- ‘i’ to view gitflow options
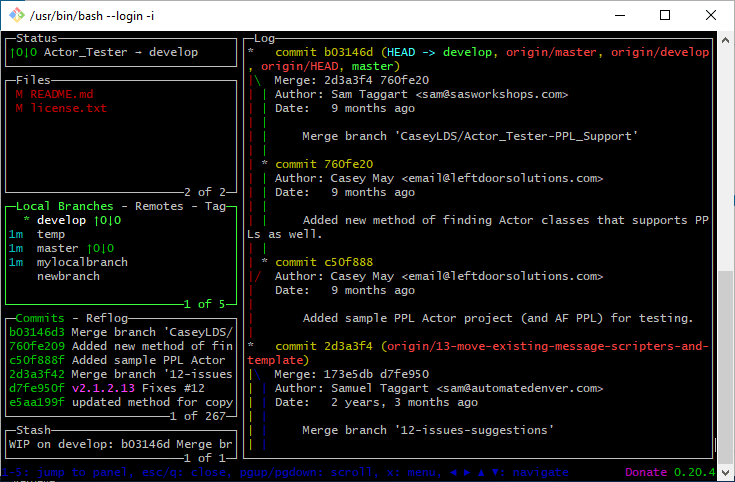
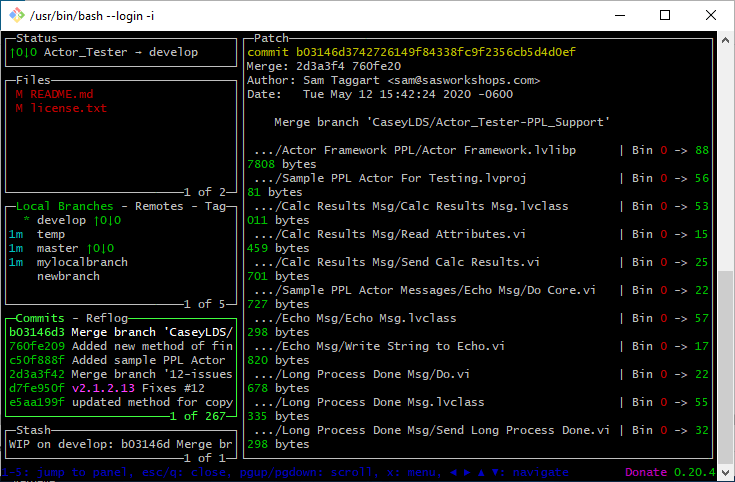
Commits View
The commits view lists all the commits in the current branch on the left. Selecting a commit here using the up and down arrows will display it’s contents in the pane on the right. This is what you would see with the git show command.
Some useful commands in the Commits View are:
- ‘g’ to reset to the selected commit. It will bring up a menu that lets you select soft, medium, or hard.
- ‘t’ to revert the selected commit
- ‘T’ to tag the selected commit
- space to check out the selected commit
- ‘c’ to cherry-pick the selected commit
- Many of the other options will start an interactive rebase (squash, edit, fixup, delete, etc) Once you enter one of those then you’ll see the commits above it turn to pick. You can go through them and change them to one of the other options if you want. When you are ready ‘m’ will bring up the rebase menu, select continue to start the interactive rebase. Do be careful with published history!
Stash View
The stash view shows you the current stashes. You can view the diffs for the selected stash in the main pane on the right.

Some useful commands in the Stash View are:
- space applies the selected stash
- ‘p’ pops the stash