Insta Coverage

I first heard about InstaCoverage at NI Week 2018. I was part of a panel discussing Unit Testing. Peter Bokor gave a brief presentation right before the panel started on a new unit testing tool IncQuiry Labs had created called InstaCoverage. He really emphasized the code coverage calculation. This is something that the NI Unit Test Framework (UTF) does (and none of the other common unit test packages do). THeir goal was to be able to do the test coverage calculation and do it quickly. Because of this emphasis on coverage, I thought it was basically a 3rd party version of NI UTF so I didn’t really pay much attention to it. I was wrong! It is definitely worth checking out. I’m still sticking with VI Tester for now, but InstaCoverage might work for you, particularly if you are using NXG or if you care about code coverage metrics.
NOTE: After publishing the original post, Peter sent me an e-mail with some thoughts. I posted it below. Be sure to read it. I did make a few minor edits to the post after getting Peter’s email.
Getting Insta Coverage
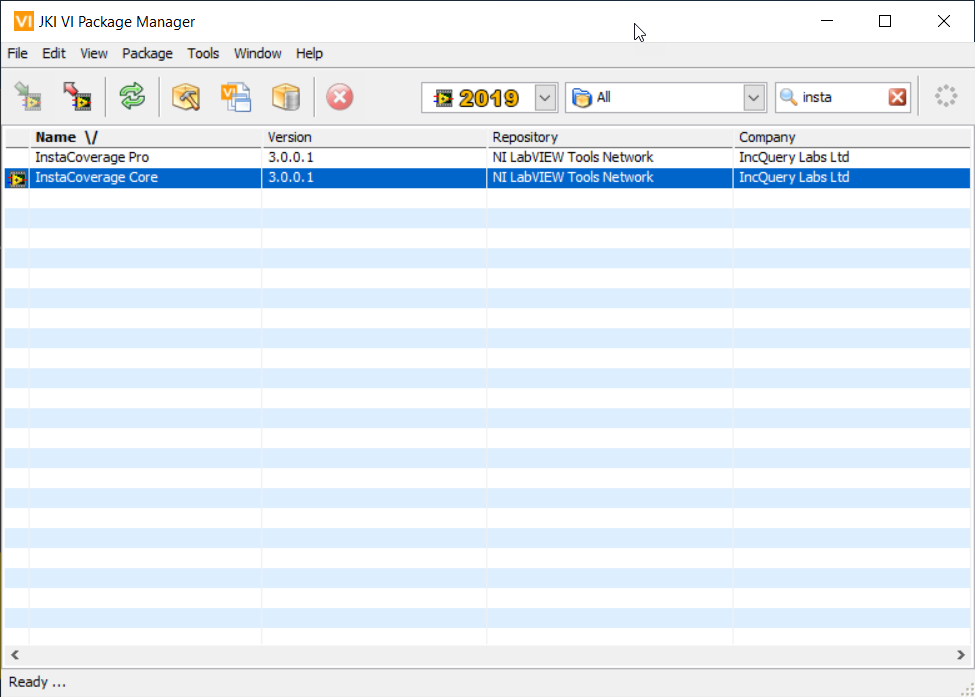
InstaCoverage can easily be installed via VIPM. There is a free Core version and a paid Pro Version, which includes some advanced features including code coverage calculations. I did not purchase the pro version, so everything I am showing you is based on the Core version. Although one can download a trial of the Pro Version, I did not.
Generating a Unit Test
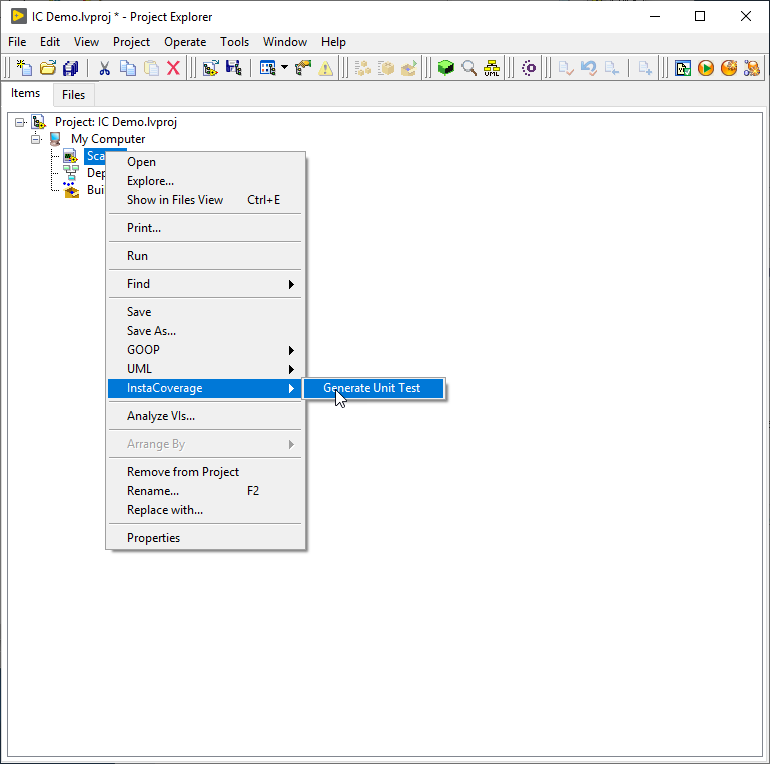
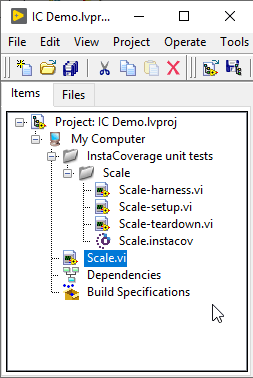
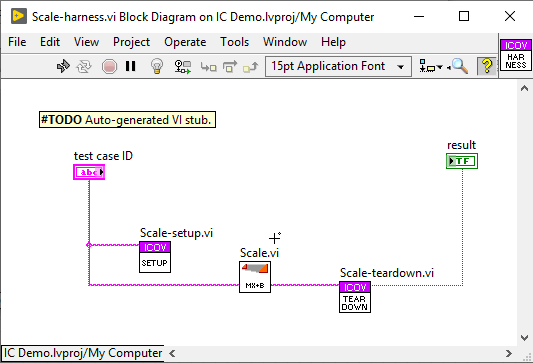
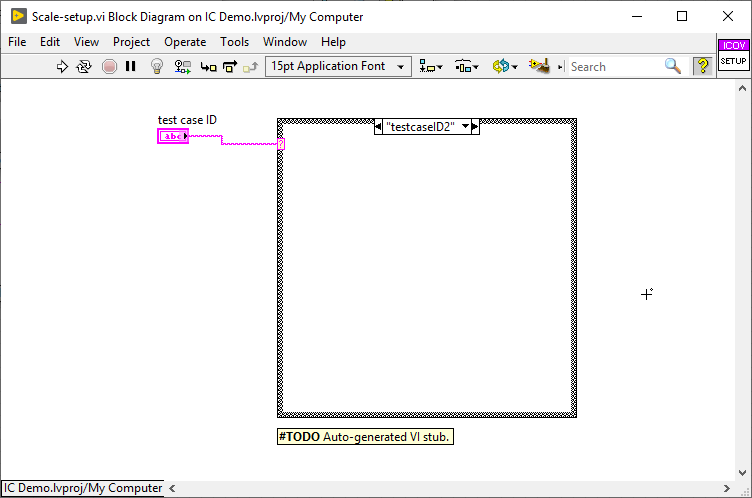
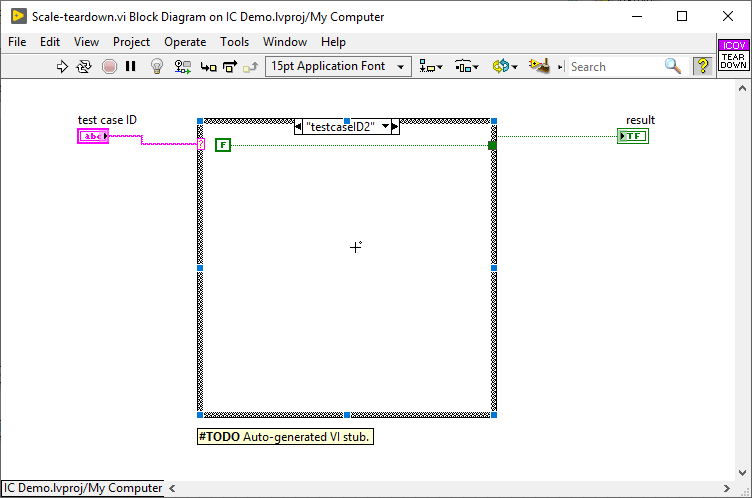
To generate a unit test, simply right click on the VI you want to test in the project explorer. There should be an InstaCoverage menu where you can select Generate Unit Test. That will create a test harness along with a setup and teardown vi. If you have the free version, you’ll have to edit all these to pass the inputs and outputs along to the VI you want to test. If you have the pro version, it should be done automatically. The tool also adds a .instacov file which holds some test configuration data. This just adds the basic framework for a test, you still have to add individual testcases (see next section).
Creating a New Test Case
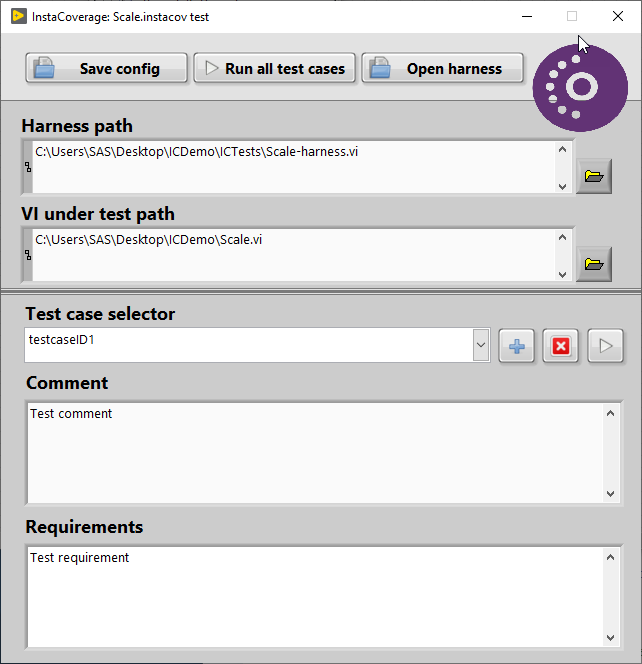
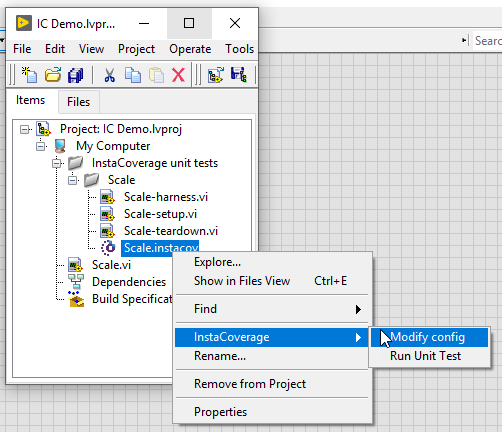
Once you create a new test for a VI, then you have to fill in the cases. Start by right clicking on the .instacov file in the project Explorer and select Modify config. That will bring up a corfig window where you can add a new test case. (Click the plus sign next to the Test Case Selector). When you add a new test case, you’ll need to update the setup and teardown to handle that case. The easiest way is to keep the config window open and copy/paste.

Running Tests
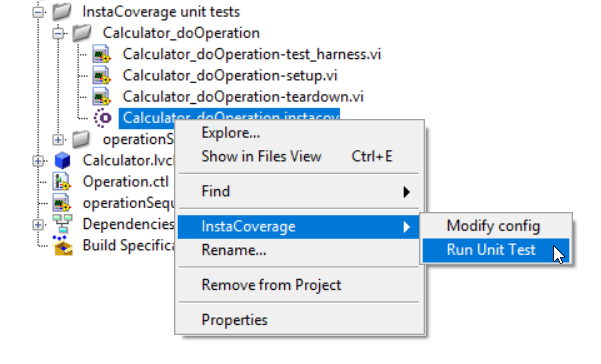
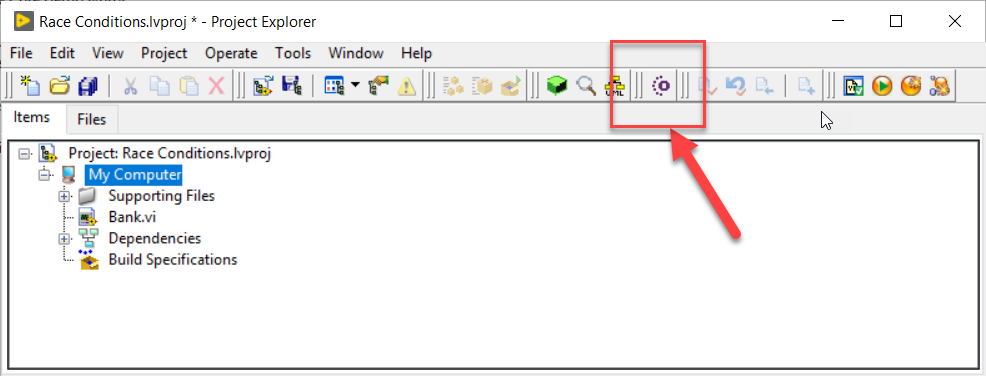
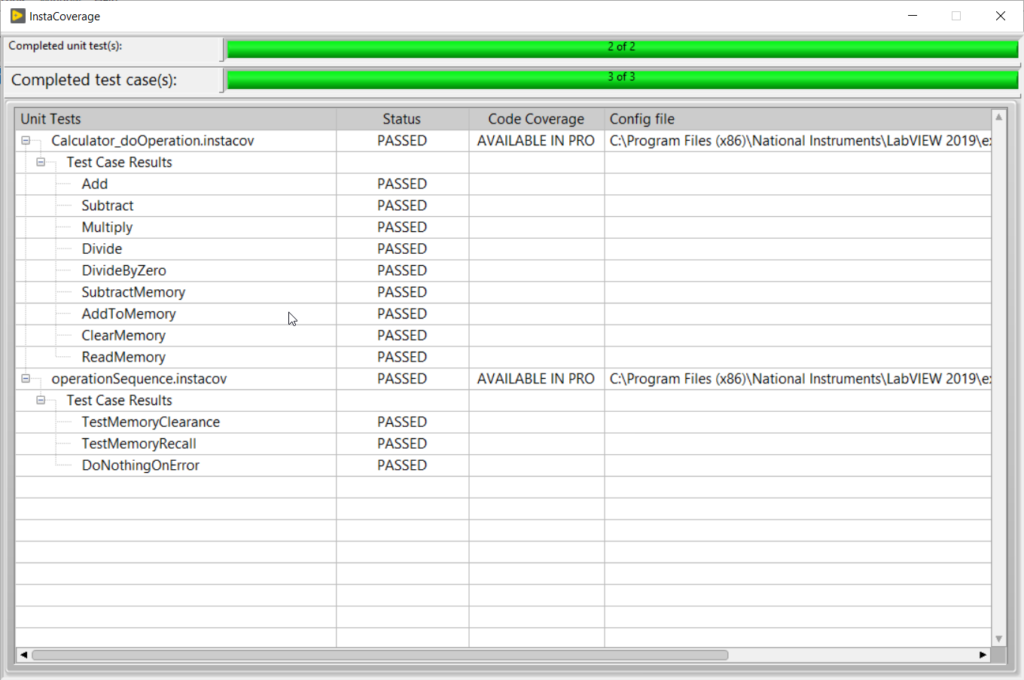
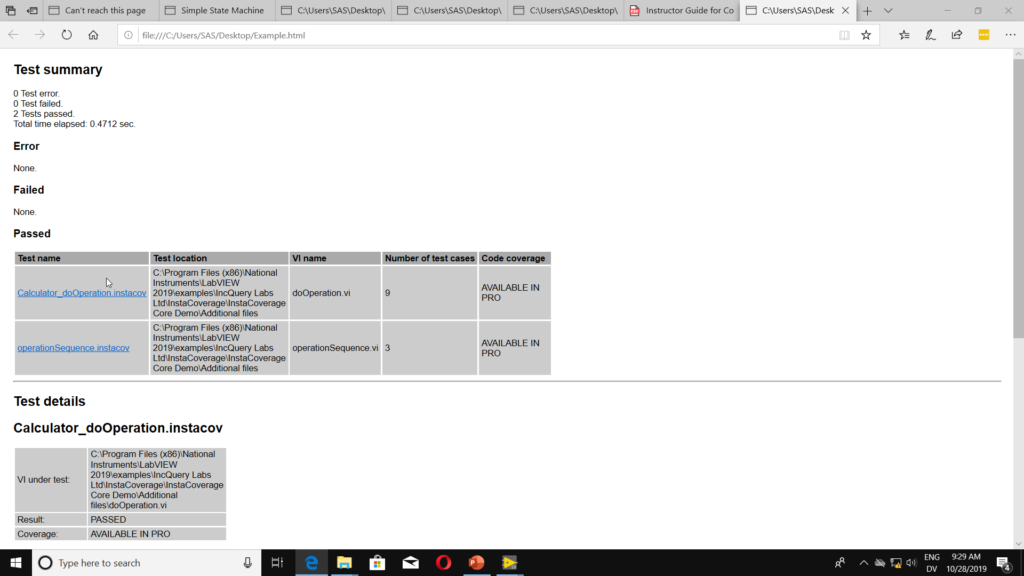
There are two ways to run tests. To run an indivdual test, right click on the .instacov file and select Run Unit Test. To run all tests, highlight My Computer and click on the logo in toolbar. Both cases will show a similar looking GUI with test results and prompt you to create a test report in either xml or html.
Likes
- It does make it very obvious what the VI under Test is.
- It makes it very easy to reuse setup\teardown code.
- It does allow you to create more than one set of tests for a VI (as in you can generate a whole second harness, setup, teardown, etc.)
- Works in NXG – I haven’t tried it but as far as I know it is the only unit test solution for NXG so far.
- Measures code coverage – for me not an issue, but if you need it, then this is much better than NI UTF – although that is a low bar. Note this is a paid feature.
- IncQuery Labs is very responsive and InstaCoverage is under active development. In fact they just released 3.0 and it appears that there is an even newer version in the works and it fixes a few things such as: support for vims and the ability to import NI UTF tests. This means that if you inherit a project with NI-UTF tests you don’t have to bother learning UTF, you can just import them into InstaCoverage. Now there really is no excuse for using UTF.
- InstaCoverage does have the ablility to run test programatically on an RT target, which none of the other unit tests tools have.
Dislikes
These are just my own personal preferences so take them with a grain of salt. InstaCoverage is still a great choice for a lot of use cases (and the only choice on NXG).
- Overall I find the general workflow kind of awkward, although that could easily be attributed to the fact that I am used to VI Tester. (Note: VI Tester was also very awkward for me at first!) I am sure if you use it regularly it would not be a problem.
- In general, InstaCoverage breaks the idea of keeping the tests simple by having no conditional code in the test – the setup and teardown are each 1 big conditional, and they are in separate subVIs. For me, that makes it harder to see and understand exactly what is going on for a particular test case. I’m a much bigger fan of the 1 test = 1 VI/test method paradigm that the other frameworks use.
- Adding a New Test Case in the config editor did not automatically update the case structures in the setup and teardown. Not the end of the world. An easy fix is to keep the config window open and copy and paste the new case so that there are no typos. Apparently this will be fixed in an upcoming release.
- A mechanism for grouping tests similar to a test suite would be nice. Right now the option is to run one Instacov file (with all of its test cases) or all InstaCov files (with all their test cases). Subsets are not supported. CORRECTION: Apparently if you group testes in virtual folders in the project, you can right click on the virtual folher to run all tests in the folder.
- Also a minor point but the way IntsaCoverage uses the term test case doesn’t quite match the xUnit use of the term. It’ a little confusing if you are coming from that background.
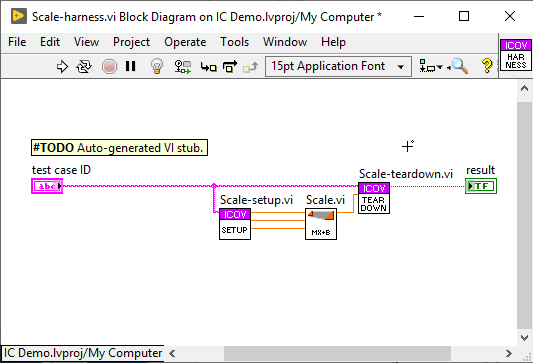
I did find a way around not being able to see everything for a single test case in one place. I was able to open the test harness vi and right click on the setup and teardown vi and select place VI contents. Then I could clean everything up and put it in a sequence frame (see below). This all seemed to work and according to Peter it shouldn’t break anything. I’m still not a huge fan of the case structures, but I find it infinitely more readable this way.

Paid Features
There are a few extra features in the paid version. Checkout the InstaCoverage website for more details.

Comparison
Peter did a great job of putting together a comparison of some of the various unit testing tools. It is quite useful.

