How to use VIPM effectively

My friend Matt Richardson recently suggested I write a post about how I use packages in my workflow, particularly how I use VIPM. This is my response. Matt, hopefully I answered all your questions.
What is VIPM?
VIPM stands for VI package manager. It is a free tool made by JKI that ships and installs with LabVIEW (as of LabVIEW 2014). So if you’ve installed LabVIEW recently you likely have a copy. VIPM manages packages of LabVIEW code. It provides tools to create, distribute and install packages.
What is a package?
Without getting too deep into package theory, each package is basically just a chunk of LabVIEW code along with some meta information. The meta information includes things like versioning information, licensing information, where the code gets installed, pre and post install actions, and dependencies.
VIPM Users
There are 2 types of VIPM users:
- Producers create packages. They use the VIPM editor to take LabVIEW code they have already written and provide the appropriate metadata to create a package file.
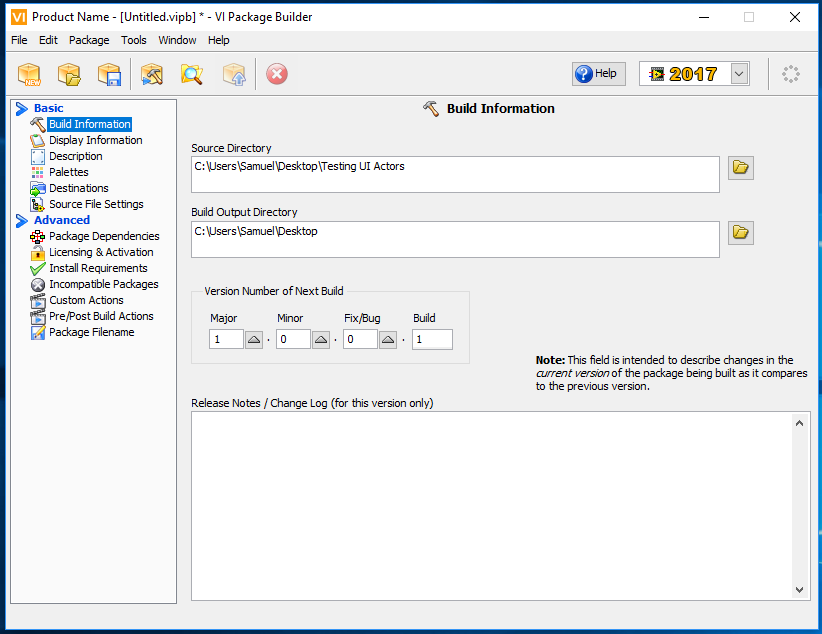
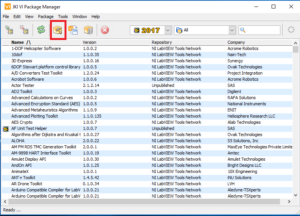
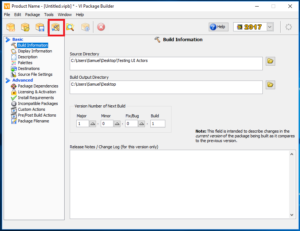
This is the package builder interface. - Consumers are the end users of the packages. They use VIPM to search through online repositories for packages and download and install them. If you use the OpenG or MGI Toolkits, or the DQMH you probably used VIPM to install them.
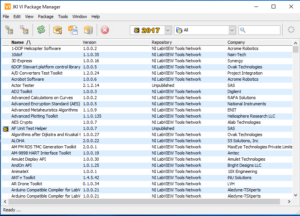
This is the main user interface for browsing and installing packages.
VIPM Use Cases
VIPM is used to distribute 2 types of packages:
- Reuse Code – The idea behind reuse code is that you’ve written some VI once and that VI is really useful so you want to include it in a future project. Using VIPM, you can take that vi or collection of vis and install them into .vilib and create a palette for it.Examples would be: the OpenG libraries, the MGI libraries, etc.
- Toolkits – Sometimes you write little utilities or scripting tools that help you write code. VIPM can help you package the various VIs and put them in the correct locations so your utility will show up in the Tools menu, or as Quickdrop shortcut, etc. Examples would be: the DQMH scripting tools, the AF Tester, JKI VI Tester, etc.
My WorkFlow For Building Packages
- Starting Point. I usually start with the source code that I want to distribute in Gitlab. I typically keep each package in its own repository. I advocate having a separate VM for each customer project, but for creating packages I really just have one VM that I use. I try to use the oldest version of LabVIEW I can get away with, that way I can use the resulting package on projects that aren’t necessarily using the latest version of LabVIEW.
- Build Spec. In order to create a new package, you need a .vipb file. This specifies which files to install and where to put them along with pre and post install and pre and post-build actions. Typically for reuse code, I use a post install action to make all installed files read-only. This encourages users to go through the correct process to make changes (more on that later). The .vipb file needs to be in the same directory as your source code. It (and any pre or post install VIs) get checked into GitLab.
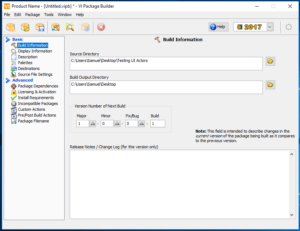
This is the button you click to create a new package build spec. - Testing. Before starting the build process, I typically do some testing. Unit tests are great. For scripting code, they are not always practical so sometimes I have a hand testing process.
- Building. This is pretty straightforward. However, I do make sure to close the source code first to prevent any potential crosslinking.
After you’ve set all the build parameters, this is the button you click to build your package. - Test Install. I typically install a package on the same machine I built it on and make sure everything appears where I want it. Maybe I run some simple tests. This can be as simple or complicated as you want it to be.
- Distribute. If you have the paid version of VIPM, you can do package feeds. I don’t. So I just push everything to a NextCloud folder where other developers can access it.
- Notify. Somehow you have to let your user know there is a new package. Package feeds do that for you. In my case, I just send an e-mail.
Fixing Bugs
We’ll skip over the install step, since that is pretty simple (if you don’t know how there are plenty of tutorials out there.) The next question then is: What happens when a user finds a bug or wants to add some feature? We have a very well-defined process for how that works.
Imagine you have 2 developers working on the same project. That project uses v1 of a package for connecting to a database. Developer A finds a problem with the package. He jumps right into the package vis (which are in .vilib) and finds the problem. He fixes it. It works. Problem solved – not quite. He only fixed the local copy. The package file still contains the buggy code. Anyone who is using v1 of that package is still using the old buggy code. This includes developer B working on the same project. So now the code works on developer A’s machine, but not on developer B’s.
The first thing we do to handle this situation is to make a post-install action so that after the package installs, all the files that are added are marked as read-only. This discourages directly editing them. We make sure that every package has an owner who is responsible for incorporating any bug fixes or updates and rebuilding and rereleasing the package. In our case, since we use GitLab, the person who finds a bug simply adds an issue in GitLab. Then the owner takes over and goes through the build and release process above. In the end both developers are notified that there is a new package available which fixes the bug.
VIPC Files
The next question is that once you have multiple versions of a package, how do you know which version is needed for a particular project. For us, we simply track it all in a spreadsheet per project. It’s simple, but there are better ways. If you pay for VIPM and get the pro version you can create VI Package Configuration or vipc files. These files contain a list off all the packages needed for a project and their specific versions. You can reference them or you can have their packages included in the file.
So the nice thing about vipc files is you only need the free version to install them. So you buy the pro version for your head architect. They decide which packages to use and create the vipc. Then all of your developers can install it using just the free version.
Pros and Cons of using VIPM
Pros
- Easy to use. Nice Interface.
- Wide adoption. Everyone already has it.
- Very easy to create palettes for reuse code.
- Pre and post install and pre and post build vis let you add lots of customization.
- Vipc files make it easier to manage configuration.
- Allows you to install a package into multiple versions of LabVIEW.
- Well-supported.
- Out of the box, VIPM includes a lot of useful free packages in its default feeds. It is also a pathway for installing tools from the LabVIEW Tools Network.
Cons
- Installation is per LabVIEW Installation, not per project. So if you have 2 projects that use different versions of the same package, you will need to switch back and forth. Vipc files make this easier, but you do have to pay to create them and you have to remember to apply them. If you want to install things on a per project basis, you should look at GPM.
- Requires some thought on management as far as fixing bugs.
- Package feed is not free.
Is the Pro Version worth it?
Well, to be honest, I haven’t actually purchased the pro version, yet. I do plan on it soon. In past years JKI has had a Black Friday, so I’m planning on waiting for that to save a few bucks. There is also a free 30-day trial, so you can check it out. If you work on multiple projects at once, then it is worth it for the .vipc files. You probably only need one license per team though since you only need a license to create the .vipc, not to install it.
The most convincing argument I have heard came from Fabiola. She, like me, is a consultant and works on a variety of projects and sometimes a variety of machines. She has one vipc file that she carries around on a thumb drive. It includes the things she uses regularly such as DQMH, JKI VI Tester, etc. It also includes some packages whose sole purpose is to set up the LabVIEW environment (ie. editing LabVIEW.ini, installing vi analyzer tests, adding quickdrop shortcuts). So basically she can walk up to any machine, plug in her thumb drive, install one .vipc file and have everything set up exactly how she wants. That seems worth a few dollars to me.
Want to learn more?
If you want to learn more about to use tools like VIPM to improve your workflow, click here to set up a free one-hour appointment where we can sit down and talk about where you are on your journey, and give you some advice and some next steps to move you in the right direction.
