Creating CHM Help Files

Help Files
If you are not creating help files for your applications, you should seriously consider it. How many times have you written an application and then one of the users comes to ask you how to do perform some task in the software? When I was writing software for lab testing equipment, I got those types of questions a lot. Most of my projects were simple test rigs for the guy down the hall. There was barely enough in the budget to get the software to work correctly, yet alone money for documentation. In those days it worked, because I was right down the hall,and it was easy for him to walk over and ask questions. Unfortunately times have changed.
As more and more people began using my software I got tired of answering the same repetitive questions. Also, as I progressed as a software engineer I looked for ways to improve the quality of my software. Adding a a well-put together help file became a way to avoid spending precious time answering basic questions and it also became a way to make my software look more professional.
My last blog post was about Innosetup. If you want to see what a good help file looks like, check out their help files…
Microsoft Compiled Help
For years the standard in help documentation has been the Microsoft Compiled Help format (chm). If you have used a computer any time in the past ten years, you have problably used a chm file. A chm is a single file that combines a bunch of html content with a table of contents and an index. It all displays in a window as seen below.

KEL CHM Creator
At first I was kind of intimidated by creating chm files, but once I found the right tools, I realized that it can be very easy. The KEL CHM creator is a very nice GUI for creating CHM files. It makes compiling the .chm file very easy. The first step is to download the Microsoft HTML Help Workshop. The next step is to get the KEL CHM Creator from here.
Getting Started
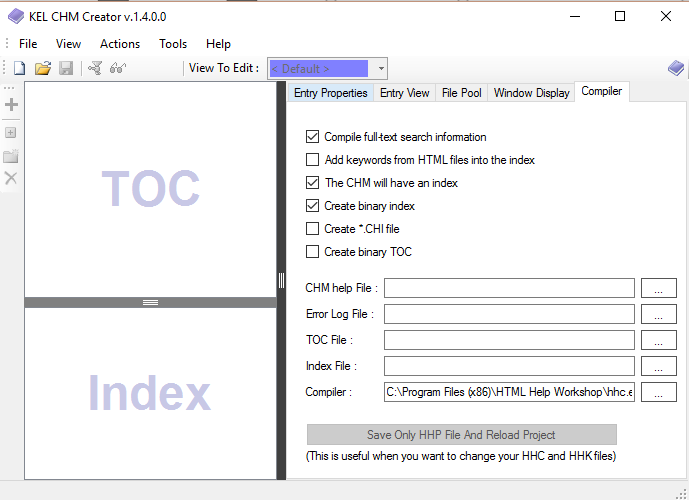
Open the KEL CHM Creator. Click on the compiler tab and make sure it points to the hhc.exe that got installed with the Microsoft HTML Help Workshop (see graphic below).
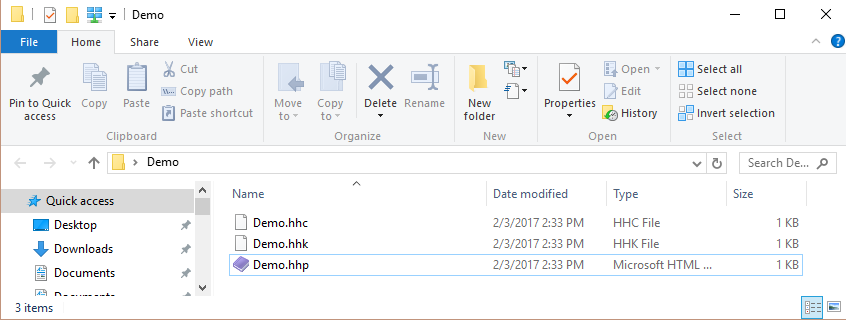
Next click on File>New CHM Project… Select the folder where all of your html content is located and click ok. This will fill in some of the fields on the compiler tab and create the support files necessary to compile everything. It adds 3 files to your folder, as seen below. The .hhp file is what you would click on to open the project in the KEL editor. The others are just support files needed by the Microsoft compiler.
Adding Content
NOTE: The KEL CHM creator does not create the .html content. It just simply tells the compiler how to compile it all. You will need to create the .html yourself using your favorite .html editor. I happen to like atom.
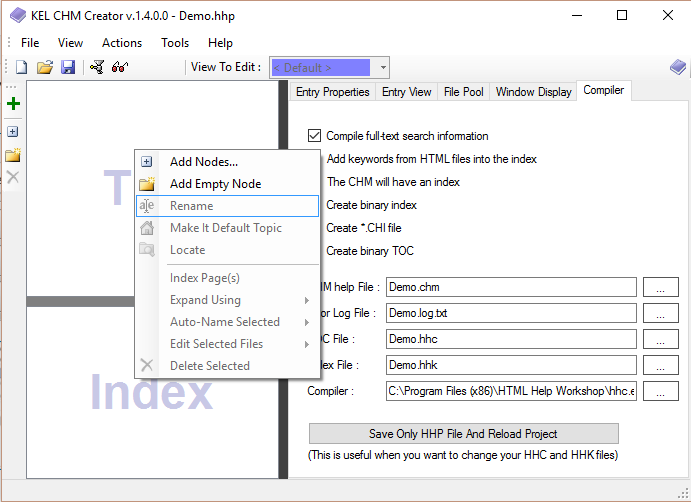
Once you have your KEL project setup and your html files created, it’s time to add them to the project. Right Clicking on the TOC pane in the editor will allow you to Add Nodes. In the resulting dialog box simply select the .html files you want to add.
Organizing Content
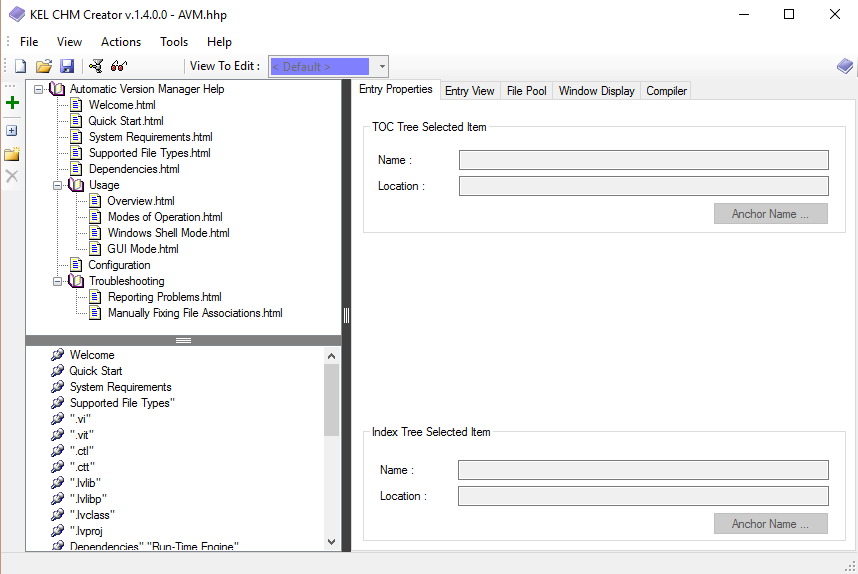
Once you have added a bunch of html files to your project, it’s time to organize them. You can drop and drop them to arrange the order. Dragging one page onto another nests it. You can also add blank node, which act like folders, by right clicking. See the example below.
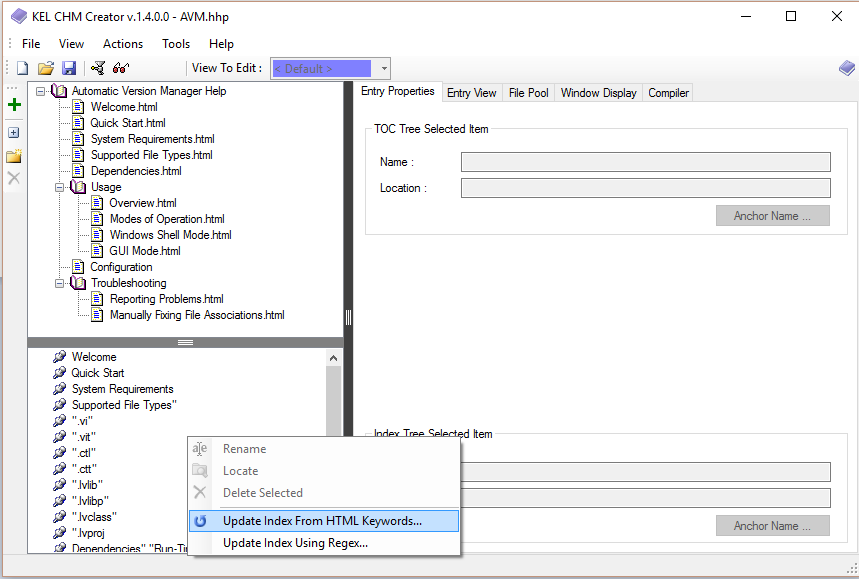
Creating an Index
The next step is to create an index. I like to do this step last before I compile. Before building the index, it is a good idea to add some tags to your .html files. Inside your header tags, add <meta name=’Keywords’ content=’My Content/’> tag and that will add ‘My Content’ to the index and link it to that particular html file. Once that is done, go to the Index pane and right click. Select “Add Index from HTML Keywords…” (see below). This will create your index.
Compiling
You are almost ready to compile. First navigate to the Window Display tab and set the window title and the default topic. Next click on the Build CHM Button (see image below.) This will compile the chm file and give you a results window where it reports any errors and allows you to view the compiled CHM file. Now you are done.

Conclusion
CHM files are a great way to provide guidance to your users. The KEL CHM Creator makes them fairly easy to create. The fact that they are html lets you embed all kinds of graphics and links to external documents and websites. If you are not planning on making one for you next project, you should.
