Unit Tests for PPLs

So in my Unit Testing Workshop, I talk about taking tests written for libraries and retargetting them to the PPL once the library is built into PLLs. The last time I taught the workshop, someone asked me for an example. I didn’t have a good example to share, so I wrote one.
Why test PPLs?
I’ve never liked the fact that in LabVIEW, it is very easy to automate testing your source code, but once you build it into an executable, there’s no easy way to do automated testing. PPLs give me a little bit of that. I can have a simple executable that calls into a bunch of PPLs and I can write unit tests for all the PPLs. With the technique I am going to show you here, you don’t even have to rewrite your tests or write extra tests. You can just as part of your CI process, retarget the existing tests for your source code libraries and rerun them on the PPL.
I’ve gotten some pushback from a few people questioning if this was really necessary. The honest answer is I don’t know. I’m not sure what type of problems would show up in a built PPL that wouldn’t be found by testing the source library. My main argument is if you already have a CI pipeline, it is only a matter of adding a few extra steps so why not?
The setup
You can get all the code for this example at https://gitlab.com/sas-blog/PPLTest. I started with a simple little VI. It takes in a string and generates a histogram of all the characters. For good measure, I threw it into a library.
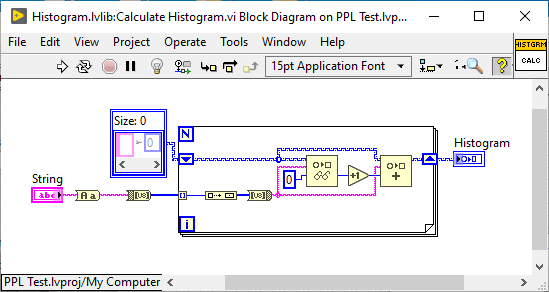
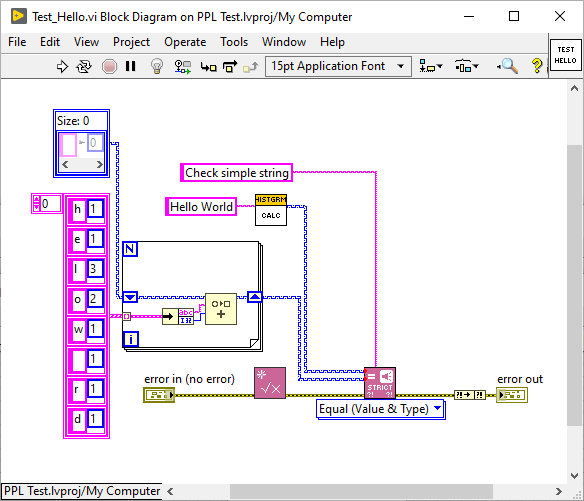
As part of my development, I wrote a really simple test for it. I actually wrote the test first in true TDD fashion. I put in a phrase and make sure the output map looks appropriate. Nothing fancy. For this exercise I chose Caraya. I prefer VI Tester, but it doesn’t really like maps, since it has been updated in a while, so Caraya worked better for this.
Running the CI Script
If you clone the repo, you’ll see there is a script called CI.sh Simply, go to Git Bash and type in ./CI.sh and it will run the CI script.
Note: This will exit LabVIEW as part of the script, so make sure you have saved anything you need to first.
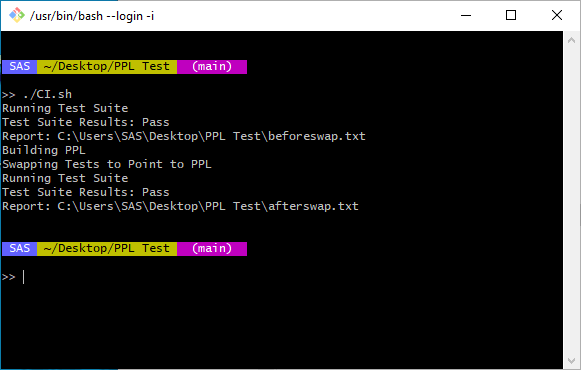
The script outputs some results. After making sure LabVIEW is closed, it the Runs The Test Suite. This is testing the source library. Then it builds the PPL. Then it swaps the test to point to the PPL. Lastly it runs the Test Suite again on the PPL.
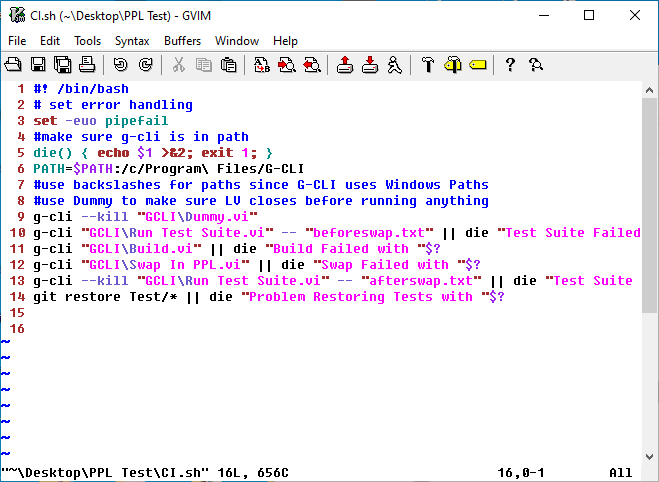
So let’s digest the CI script:
- Line 3 sets up some error handling.
- Line 5 defines a die function. If any of the g-cli steps fail, we’ll jump to the die function, output a failure message and exit with an output code of 1. This is to notify the calling CI process (Gitlab or Jenkins) that the CI failed.
- Line 6 is just to make sure that g-cli works. It adds it to the path so bash can find it.
- Line 9 is just to exit LV. We want to make sure nothing is in memory. Dummy VI doesn’t do anything but return. I’ve since learned that there is a command builtin to g-cli to do this, but I didn’t know about it at the time and never went back and fixed it.
- LIne 10 Runs the Test Suite. Beforeswap.txt is the output file. The || means if this command fails (ie outputs something other than 0) , run the die function. The $? appends the output code of the g-cli to the output string.
- Line 11 builds the PPL
- Line 12 is where the magic happens. This VI loads all the tests and swaps the original library for the PPL and then saves them.
- Line 13 Runs the Test suite again.
- The git restore command at the end is to throw away all the changes to the tests, so they should now point back to the original library. You do have to be careful running this script, because if you have made changes to a test but haven’t committed them yet, running this CI script will throw away those changes when the git restore command runs at the end.
If you want to verify that the script actually works and does what it claims to do, open LabVIEW and make sure the tests are all pointing at the Source Library. Then comment out the last line of the script: the git restore command. Run the script. Then open the project and look at the tests again. You’ll see they are now pointing at the PPL.
If you want to learn more about writing bash scripts, I highly recommend: Julia Evans’ Bite Size Bash. All of her zines are great, but that one is particularly good.
The Secret Sauce
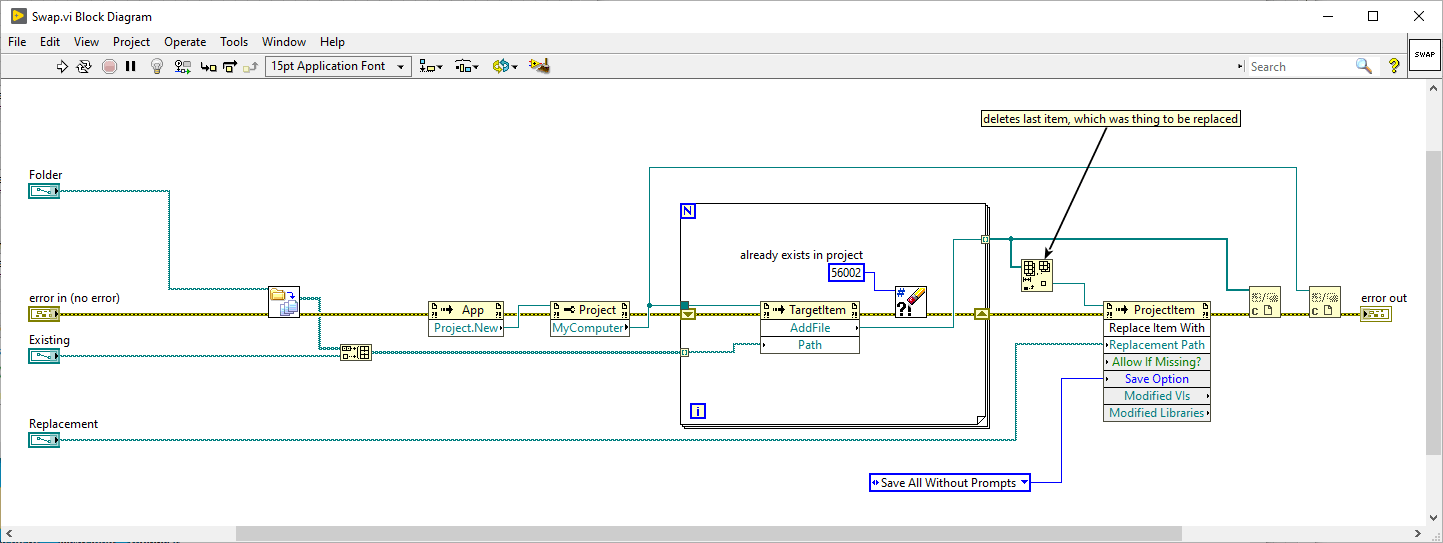
The next question is: what makes all this work? How do I actually replace the library with the PPL. The magic happens in one VI called Swap.vi The real magic is just one invoke node. It is available in LabVIEW 2019 and later. It’s the “Replace Item With” method on the ProjectItem class.

The process is simple:
- I take all the files in the Test folder (where all my unit tests are) and I add them along with the existing library into a new project. The existing library must be part of the project in order to replace it. I ignore the errors because if I add a class and then try to add a method of the class I get an error because it is already in the project. I could try and account for that, but the easy way is just add everything and ignore the errors.
- Then I do the replace and I select save without prompts. If we are going to run this as part of a CI process, we don’t want any prompts.
- Then I simply close everything without saving the project.
Help!
If you want to learn more about how we can help you to setup Continuous Integration or Unit Testing for your project, let’s talk.
