Graphics Design for LabVIEW: Tips and Tricks

Graphic design should be important to anyone who designs and sells software. The look and appearance of your final product makes an impact on what your users think of your software. You want it to look professional. Unfortunately, especially if you are an engineer turned LabVIEW programmer like me, you may not have a lot artistics skills and may not know a lot about graphic design. It’s ok. I’ve been there. Fortunately designing graphics for a LabVIEW application is not terribly hard. If you are smart enough to code in LabVIEW, you can figure this stuff out. You just need pointed in the write direction. I am by no means a graphic designer, but making use of a couple free tools I’ve been able to design some really nice user interfaces in LabVIEW.
My main goal in designing graphics for aLabVIEW application is to make the program look like it was not written in LabVIEW. I know you’ve all seen plenty of programs, where you look at it and you just immediately know it has been written in LabVIEW. And let’s face it, LabVIEW is UGLY! There is a whole lot that goes into UI design. There’s control layout, use of subpanels, resizable UIs, designing for touch screen devices, and a whole lot more topics I suggest you research all those, but I’m going to talk today about some of the more basic concepts. We are going to take a step back and look at just the graphics side of things.
Step 1 – Color Scheme
When desiging graphics for a LabVIEW application, the first place I usually start is with a color scheme. I generally start with the customers logo. Generally I want to feature their logo in the finished product. Since it is going to be there, I might as well use that as a starting point and design the color scheme around that. Logos are generally pretty simple color-wise. Typically they might have 2-3 colors. I like to take those colors and throw them into Adobe Colorwheel. If you don’t like Adobe, there are plenty others. Just google “Colorwheel”. It takes a little playing around with, but you should come up with a set of 5 or so colors. There are several different color rules to use. Just google them if you want more info.
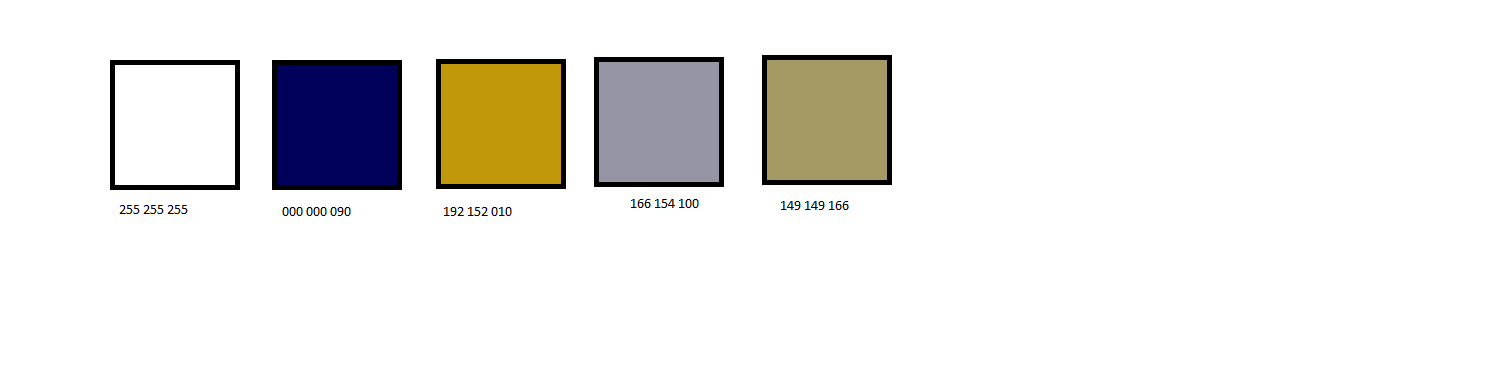
After I pick my colors, I make up something like the graphic below. I like to have a single graphic with a swatch of each color and then write the RGB values for each underneath them. I’ll either have this open on the screen or printed out in front of me as I’m working. Having it on the screen is nice because I can use the color picker.
Step 2 – Custom Controls
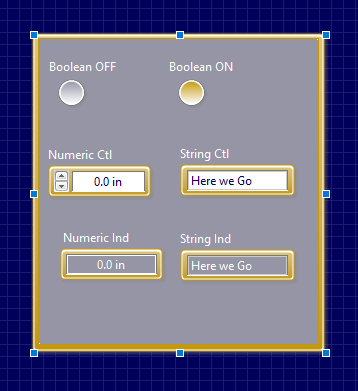
Typically I take this color scheme and then assign certain colors to certain things. For example, with the colorset above, I used the dark blue as a background color with white text. I used the 2 yellow shades for LEDs. I used the grey for backgrounds on controls and indicators with either white or bark blue text. Generally I would create a custom controls folder in my project and play around with the color pallette until I got some controls I liked. Then when desiging my frontpanels, I would just right click and goto “Select File..” and browse to my folder full of custom controls. Or maybe drag them out of the project window. Just play around and see what catches your eye. Remember a lot of this is artistic and subjective. Pretty much anything looks better than the traditional LabVIEW look. I try to put together a sample like below.
Step 3 – Custom Drawings.
The next thing I look at is custom drawings. Custom drawings might be for icons for boolean buttons (there are a lot available out there, look through some collections on google before you commit to drawing your own). They are also useful to add graphics to your program. For example a drawing of a pump or motor. A really interesting thing to do is to generate some animation by using some animated gifs (google it – there’s lots of ways to do it) or perhaps a simple picture ring that you programatically control – that may be a seperate post later. For now though let’s go over the basics of how you design a graphic and import it into LabVIEW. Before you go reach for trusty old Microsoft paint, there is a better solution.
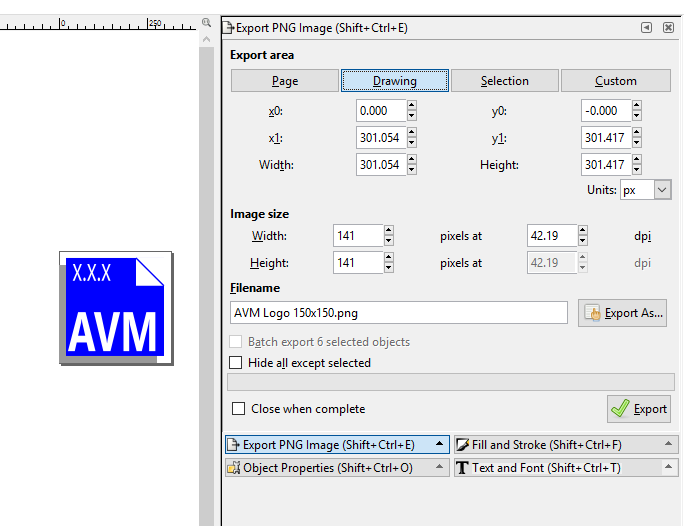
I really like a program called Inkscape. It is basically a free opensource equivalent of Adobe Illustrator. It can be complicated to use, but if you just keep it to simple shapes, it is not too bad. There are some good tutorials online. The nice thing about inkscape that it creates graphics in vector form. This means they scale very well. Unfortunately LabVIEW accepts graphics in raster form. (if you don’t know the difference, google it). That’s ok, we can export an inkscape image using the “File > Export png image” command. See screen shot below.
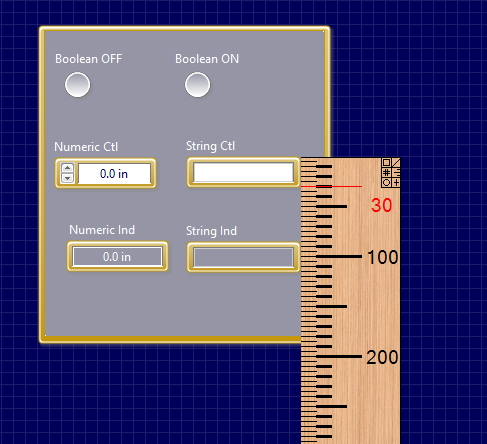
The next problem is that we need to know what size we want. This is easily solved. There is a free program called “A Ruler for Windows”. It is a pixel based ruler that you can move around your screen. See screen shot below.
Once we’ve exported the .png file, we need to get it into LabVIEW. For just graphics on the screen, we can drag the .png file from Windows Explorer and drop it onto the front panel. You can also drag it into picture rings. Booleans are a little trickier. It depends on what you want to do. If you want a specific graphic for true and a different one for false, then do the following: Copy one of the images to the clipboard and then in the control editor, you can right click on the boolean and select “import image from clipboard’. That replaces the entire button with your graphic (be sure to select which state you want that graphic to represent – ie. True/False). Repeat for the other state. This presentation goes over it well. Another option is to take the Silver buttons and replace the image on those. Here is link to a discussion about how to do that.
Step 4 – Generating windows icons.
A last little step I like to do is to generate an icon for my executable. I like to design mine in inkscape, as the normal LabVIEW in the executable builder, leaves a lot to be desired. My favorite program for doing that is Online Icon Converter. Another fancy trick is to associate files with your .exe using the registry and give them your own fancy icons (maybe that will also be another post later).
